Tracking pixel
The Mantle tracking pixel allows you to capture and analyze customer behaviour. Identify trends, provide better customer support, and make the best product decisions with insight into where your customers are spending their time in your app. Take it a step further and build a funnel with different actions, even send custom tracking events, for example if you want to track how well your new onboarding flow is performing.
Adding the pixel is a simple drop-in JavaScript tag, nothing more is needed, we handle the rest. We’ll automatically attribute each event with the correct customer in your Mantle account.
Set up your pixel
- Go to the app you want to set up on the left nav menu
- On the top right, hit the Settings button to go to the app settings page.
- On the right of the settings page, you’ll see a card labeled “Customer behaviour tracking”, hit the “Manage tracking” button in this card.
- Hit the Enable Tracking button to enable it.
- Copy the
<script>tag and put it in your app where it will be loaded on every page
That’s it! Your app will send usage events to Mantle for each page view and user session start. Next, let’s dig into the data that’s being sent and what you can do with it.
The data
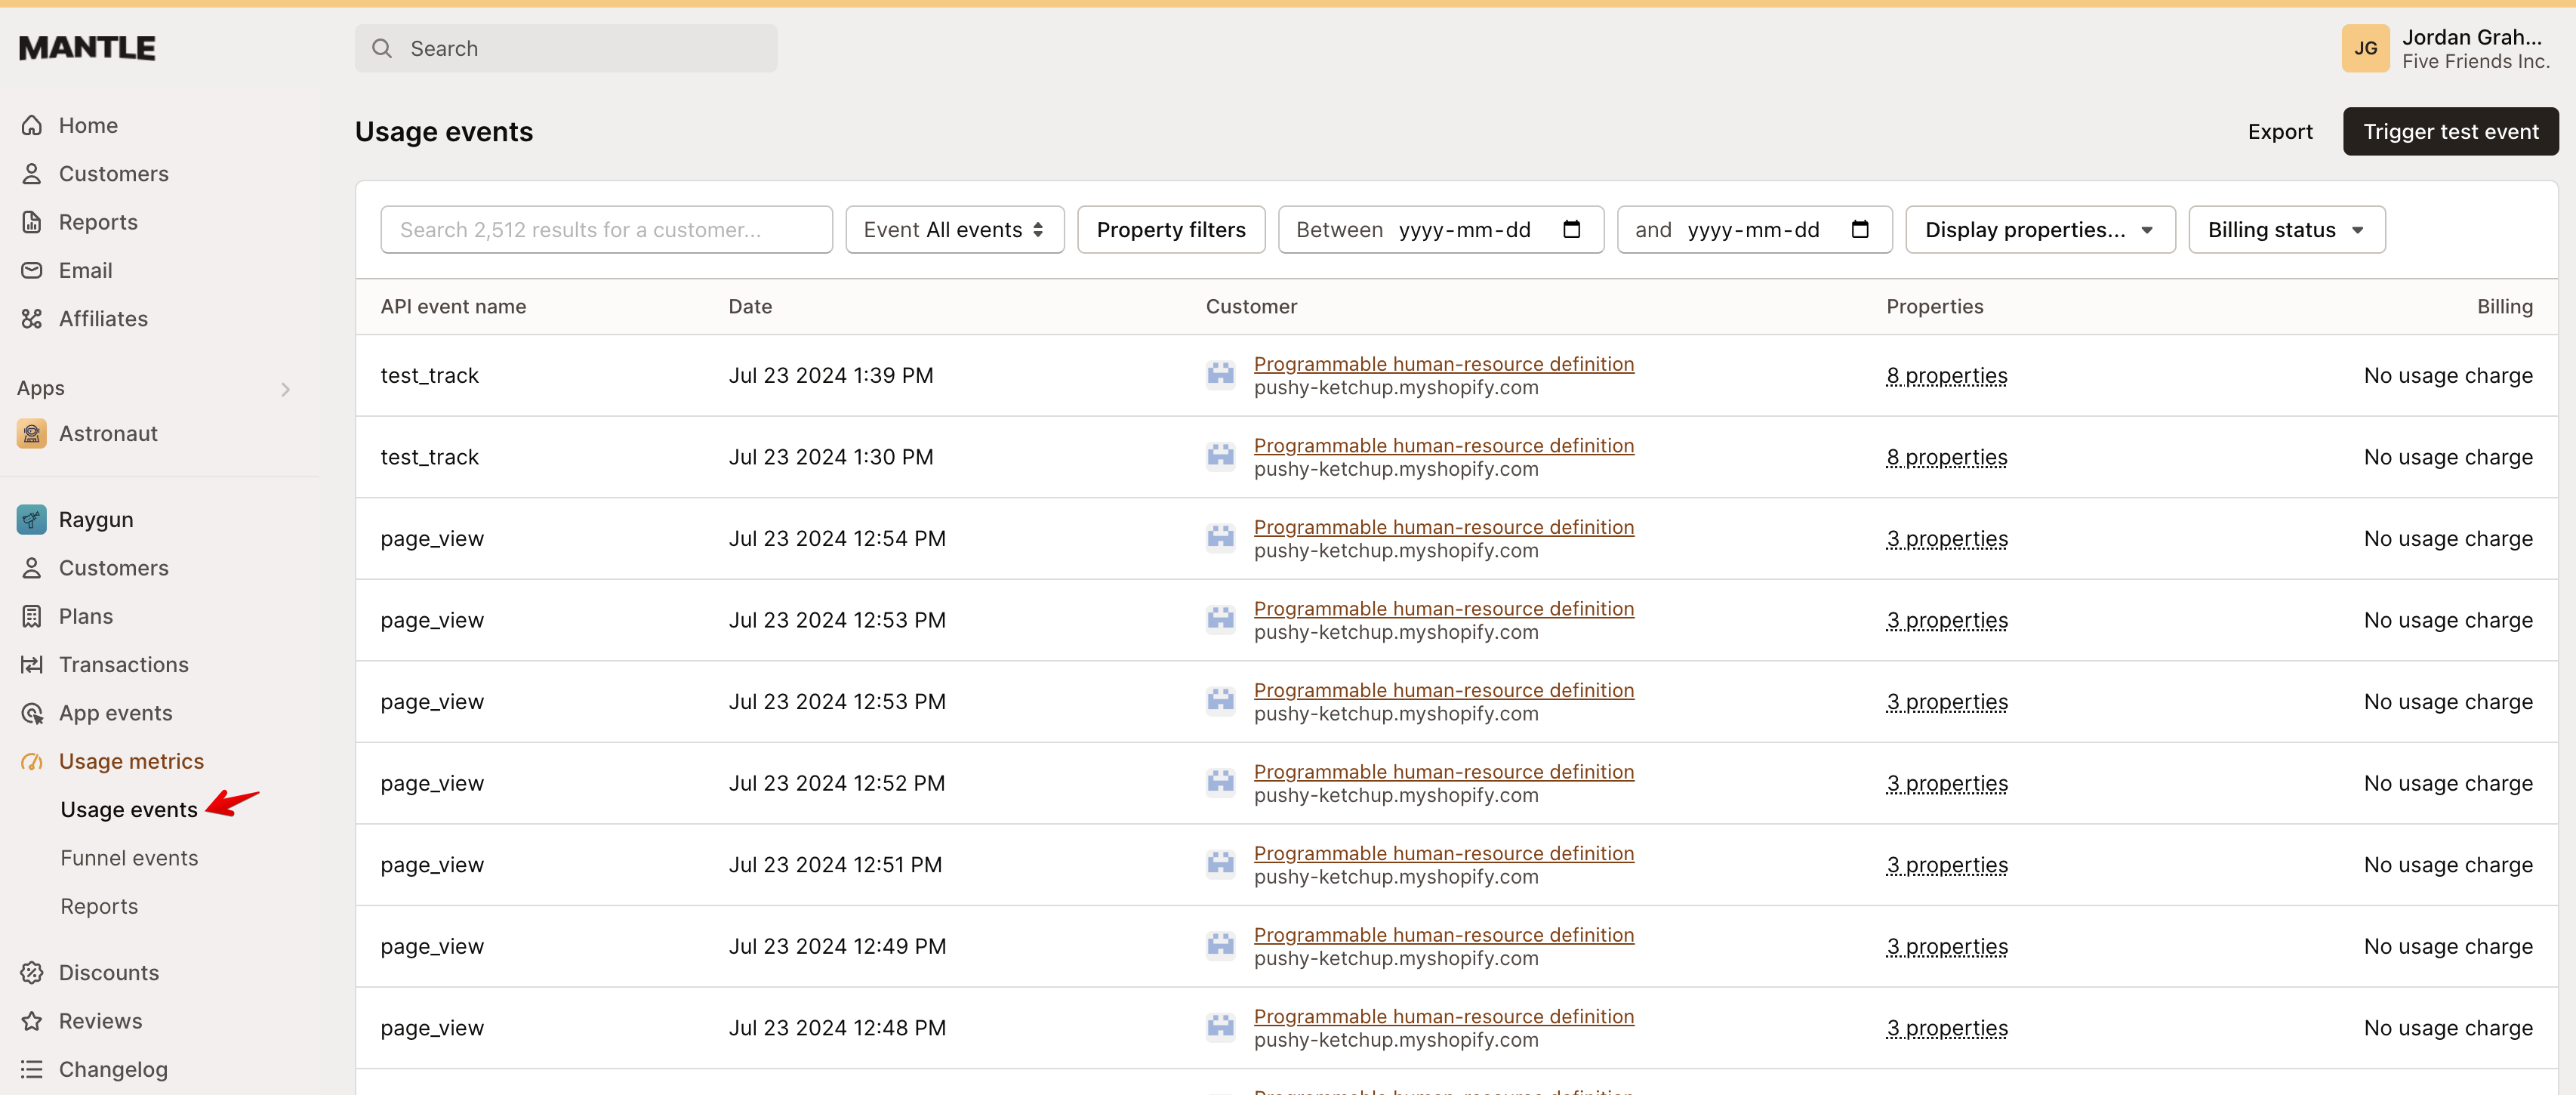
The tracking data is sent to Mantle as usage events, which are not only used for billing purposes but can also be used for any kind of event-driven analytics. You can find the usage event data under the app -> Usage metrics -> Usage events.
Mantle will automatically send page_view and user_session_start events, you do not need to instrument these in any way to start using them.
The custom properties sent with each event sent from this pixel, including custom events, include
- url: the browser URL when the event occurred
- path: the full path when the event occurred, such as /products/123/activate
- route: the normalized path, such as /products/[id]/activate
- session_id: the unique session ID for the users current session
- query: the url parameters, as nested properties.
You can also send custom parameters for each event using the properties argument on the track request. See the Custom events section below for more details.
Reports and analytics
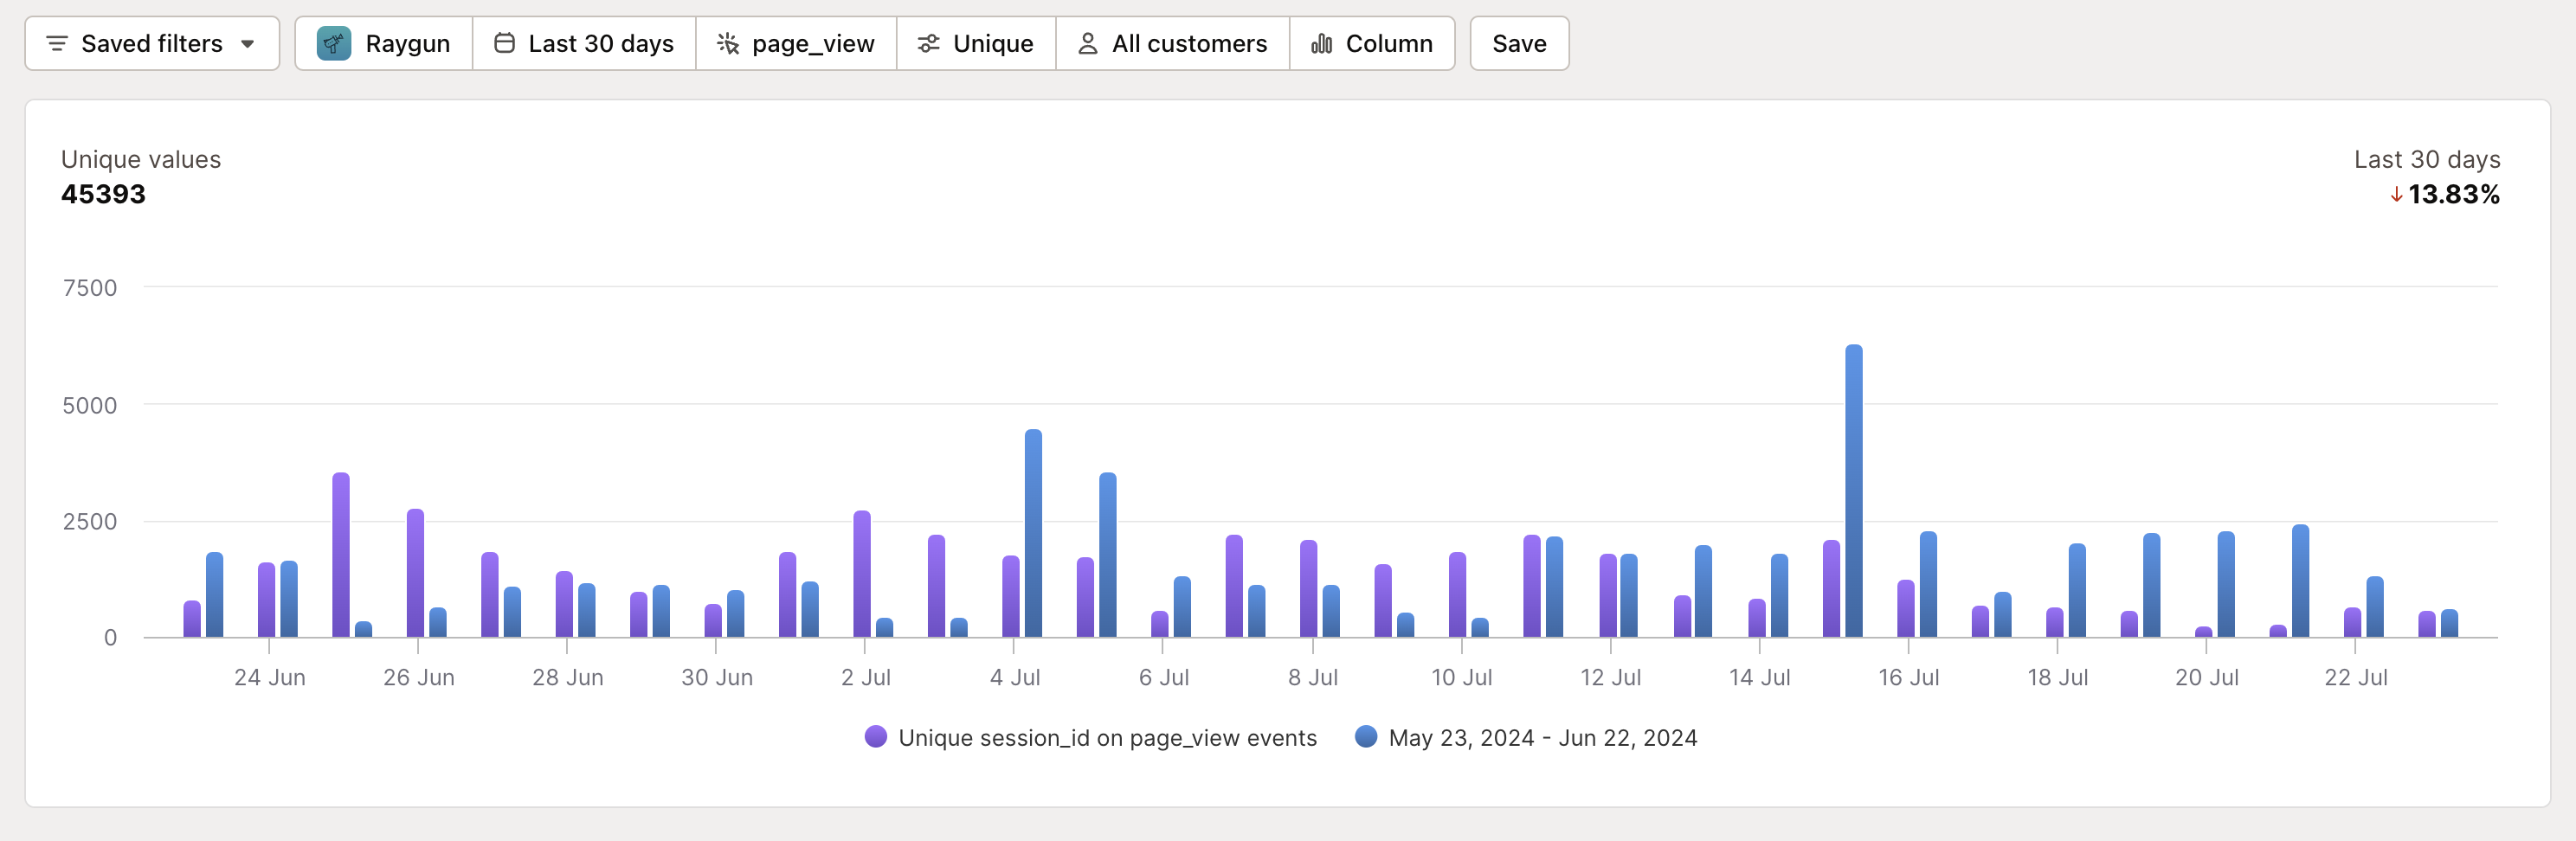
Using this data, you can slice and dice the raw event list, build a funnel from specific page views (we recommend using a filter on the normalized route property), or view trends and time-period comparison using the usage events report builder.
For example if you want to gain some insight into page view activity per unique session, you can open the usage events report and select the page view event, then the aggregate method of “unique” on session_id.

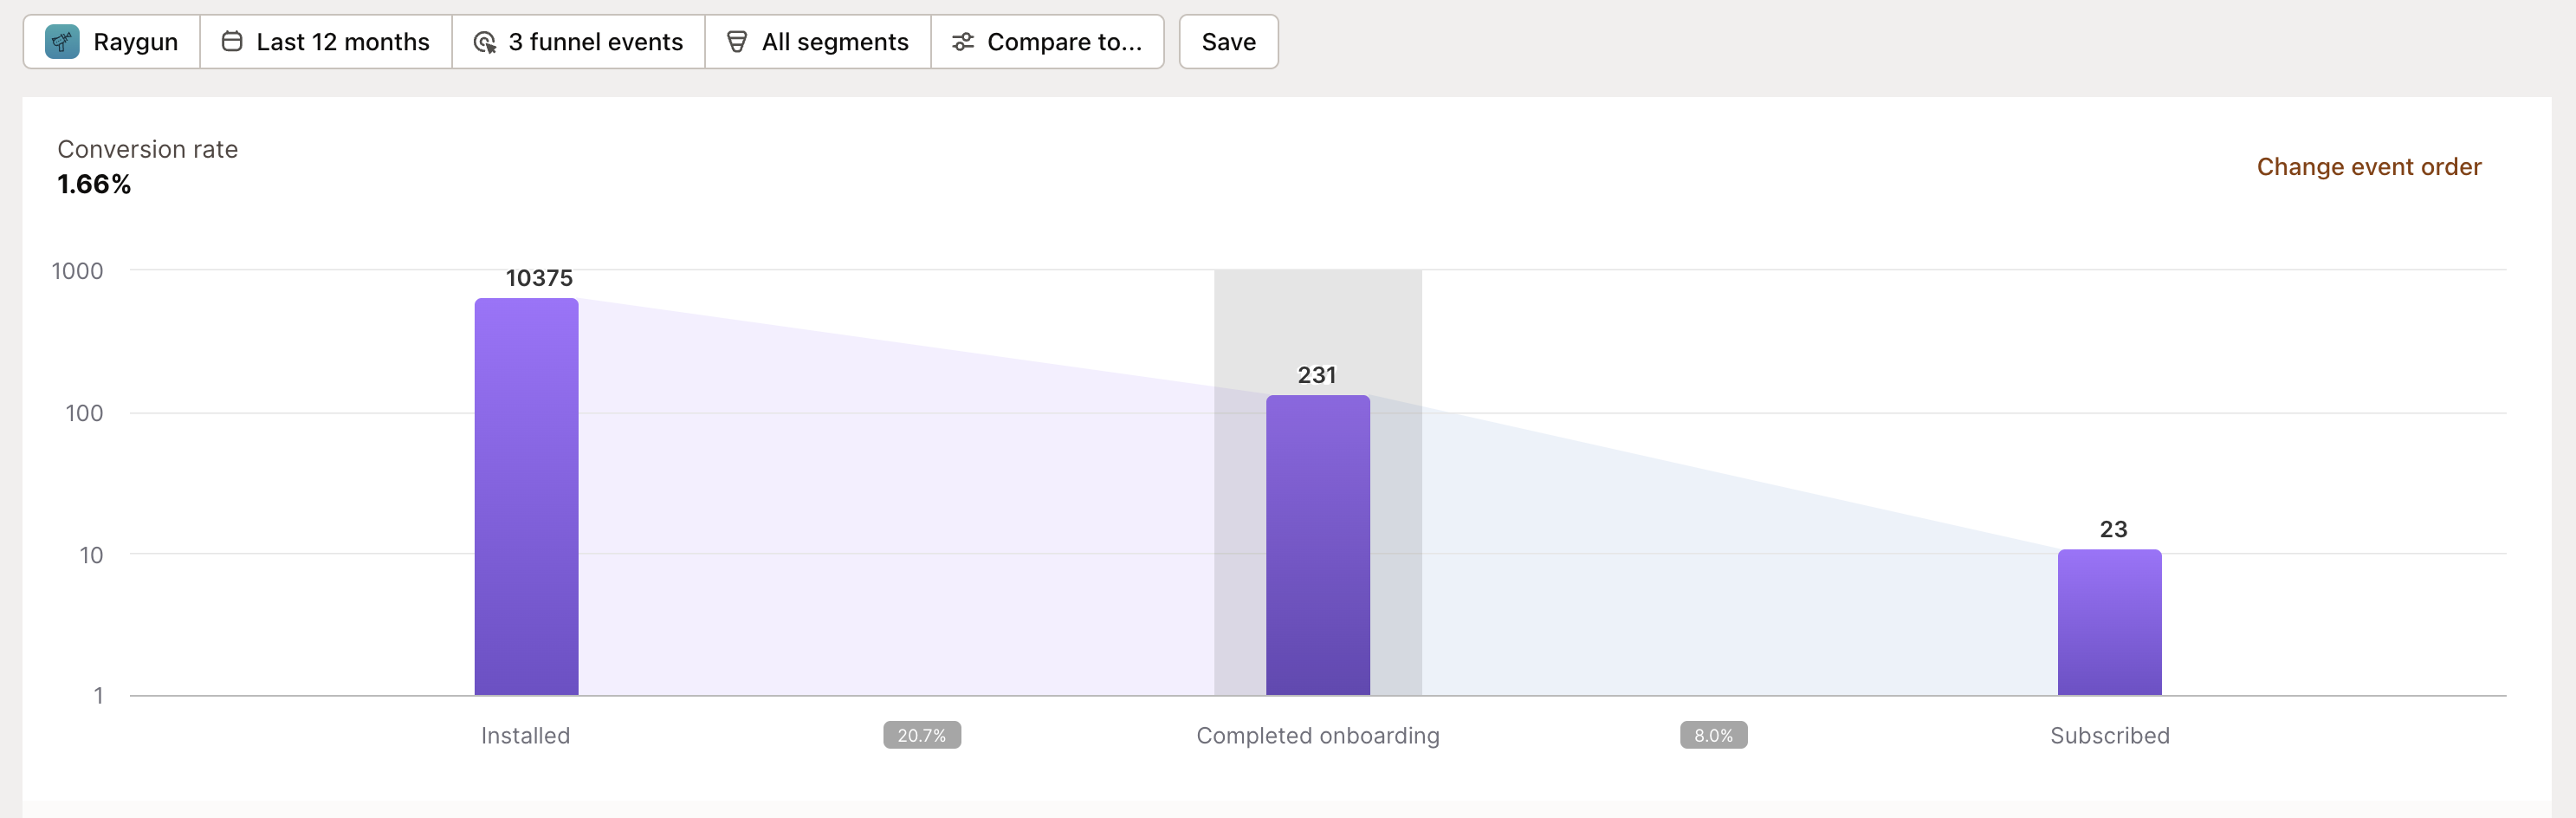
Or if you’re looking to track conversion rate of a new onboarding flow, go to your funnel report and select your custom onboarding completed funnel event along with the important events around it (installed and subscribed, for example).
Custom events
While we automatically send page_view and user_session_start events, you may have other events that are important to track. Sending custom events is a single line of JavaScript:
mantleTrack.track('onboarding_complete');You can also include custom properties in these events using the properties option:
mantleTrack.track('onboarding_complete', {
  properties: {
    requested_setup_help: true,
    skipped_onboarding: true,
  },
});
You can use these events in the same reports as the automatic events.
Advanced usage
If you want to prevent auto initialization of the tracking library, you can include the skipStart=1 URL parameter on the script tag URL that you include in your app. You could then initialize and start tracking when your app is ready, including custom (optional) configuration:
window.mantleTrack.startTracking({
  customerId: currentUser.shop.id
  properties: {
    user_id: currentUser?.id,
    email: currentUser?.email,
    customField1: 123,
    customField2: "abc",
  },
  beforeSend: () => shouldSendEvent({ currentUser }),
});
The arguments to startTracking are all optional, included here for illustration purposes only.
- customerId can be included to overwrite the scripts automatic shop detection. This can be the Shopify shop ID or myshopify.com domain.
- properties are pre-set set of properties that will be included with all events sent, merged with any properties you include on the event itself.
- beforeSend is a callback function that you can use to dynamically send or not send the event, if it returns false the event will not be sent.