Invite and manage your team
Getting your team set up in Mantle is simple – whether you’re flying solo or managing a larger team, everyone can get exactly the access they need to do their best work.
Adding team members
Head to Settings > Team to invite and manage your team members. You can do this during your initial setup or add people anytime.
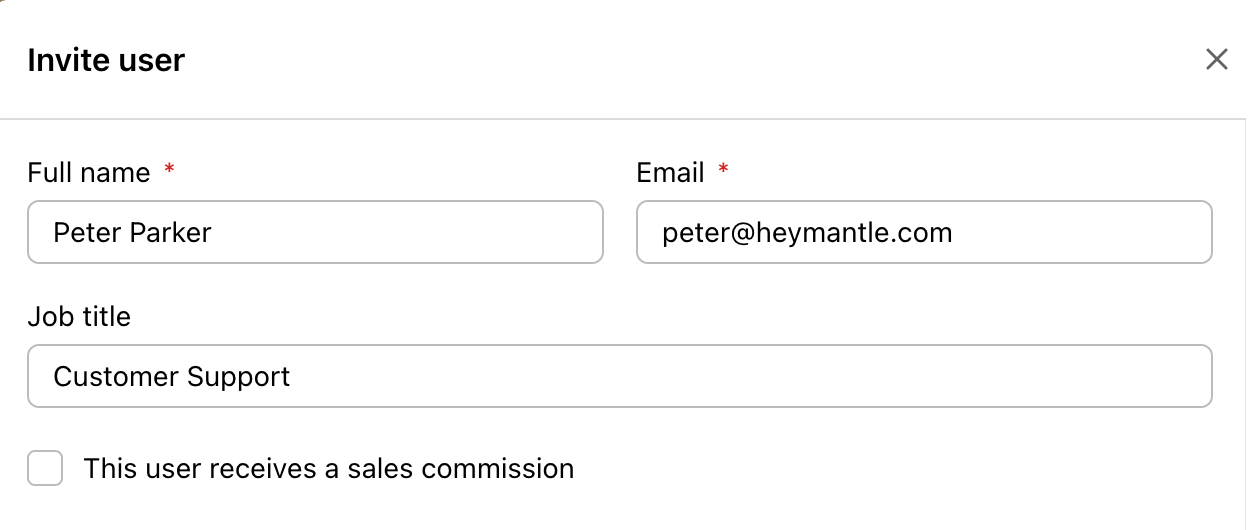
Click Invite user, fill in their details including full name, email, and job title, then pick their role and permissions:
Here’s what happens next:
- If they already have a Mantle account, they’ll be added instantly and get a notification email
- If they’re new to Mantle, they’ll get an invitation email to create their account and join
- Either way, they can start using Mantle right away
User roles explained
Pick the right role based on what each person needs to do:
Admin
Admins can do everything – manage users, access all reports and customer data, handle organization settings, and configure apps.
Staff
Staff can access all reports and customers but can’t manage team members or organization settings. Perfect for most team members who need full visibility into your business.
Developer
Developers get the technical access they need – they can add apps, edit settings, manage API keys, and access integration tools.
Customer Support
Customer support can access all customer profiles and help with inquiries, but don’t get access to financial reports or revenue data.
Sales
Sales team members can view customer information for their sales activities and manage relationships, but can’t access detailed analytics or other team members’ data.
Advanced permissions

Want to get more specific? You can customize permissions across three areas:
Customer permissions
Control what team members can do with customer data:
- View financial metrics: See revenue, MRR, and billing information
- Manage tags: Add and remove customer tags
- Manage contacts: Add and edit customer contact information
- Edit notes: Add internal notes and comments

Report permissions
Give access to all reports or pick specific ones. This is handy for sales teams who need customer data but maybe not overall business metrics.

Feature permissions
Control access to specific features like affiliates, flows, email marketing, intake forms, and partnerships.

Developer-specific permissions
For developers, you can also control:
- Can manage API keys: Let them create and manage app API keys
- Can add plans to apps: Permission to create and modify pricing plans
Managing existing team members
Making changes
Click on any team member to edit their details, change their role, or tweak their permissions. Changes happen immediately.
Removing team members
Need to remove someone? Click on them and select Remove from organization. This removes their access right away but keeps any historical data – you can always re-invite them later.
Permission hierarchy
- Owners can manage everyone
- Admins can manage everyone except owners
- Staff and other roles can’t manage team members
Sales commissions
Want to track commissions for your sales team? You can assign revenue-based commissions to team members based on the customers they bring in.
Setting up commission tracking
Go to Sales tracking on the Team page and set up your payout rules:
You can configure:
- Commission payout frequency: How often commissions are calculated
- Default commission percentage: Your standard commission rate
- Commission duration: How long team members earn from their customers
Enabling commissions for team members
You can turn on commissions two ways:
- When inviting new users: Check the commission option during invitation
- For existing users: Edit their profile and enable This user receives a sales commission

For each person, you can set:
- Commission percentage: Individual rate that might differ from your default
- Commission duration: How many billing cycles they earn from each customer
- Commission history: See all past and current assignments
Linking team members with customers
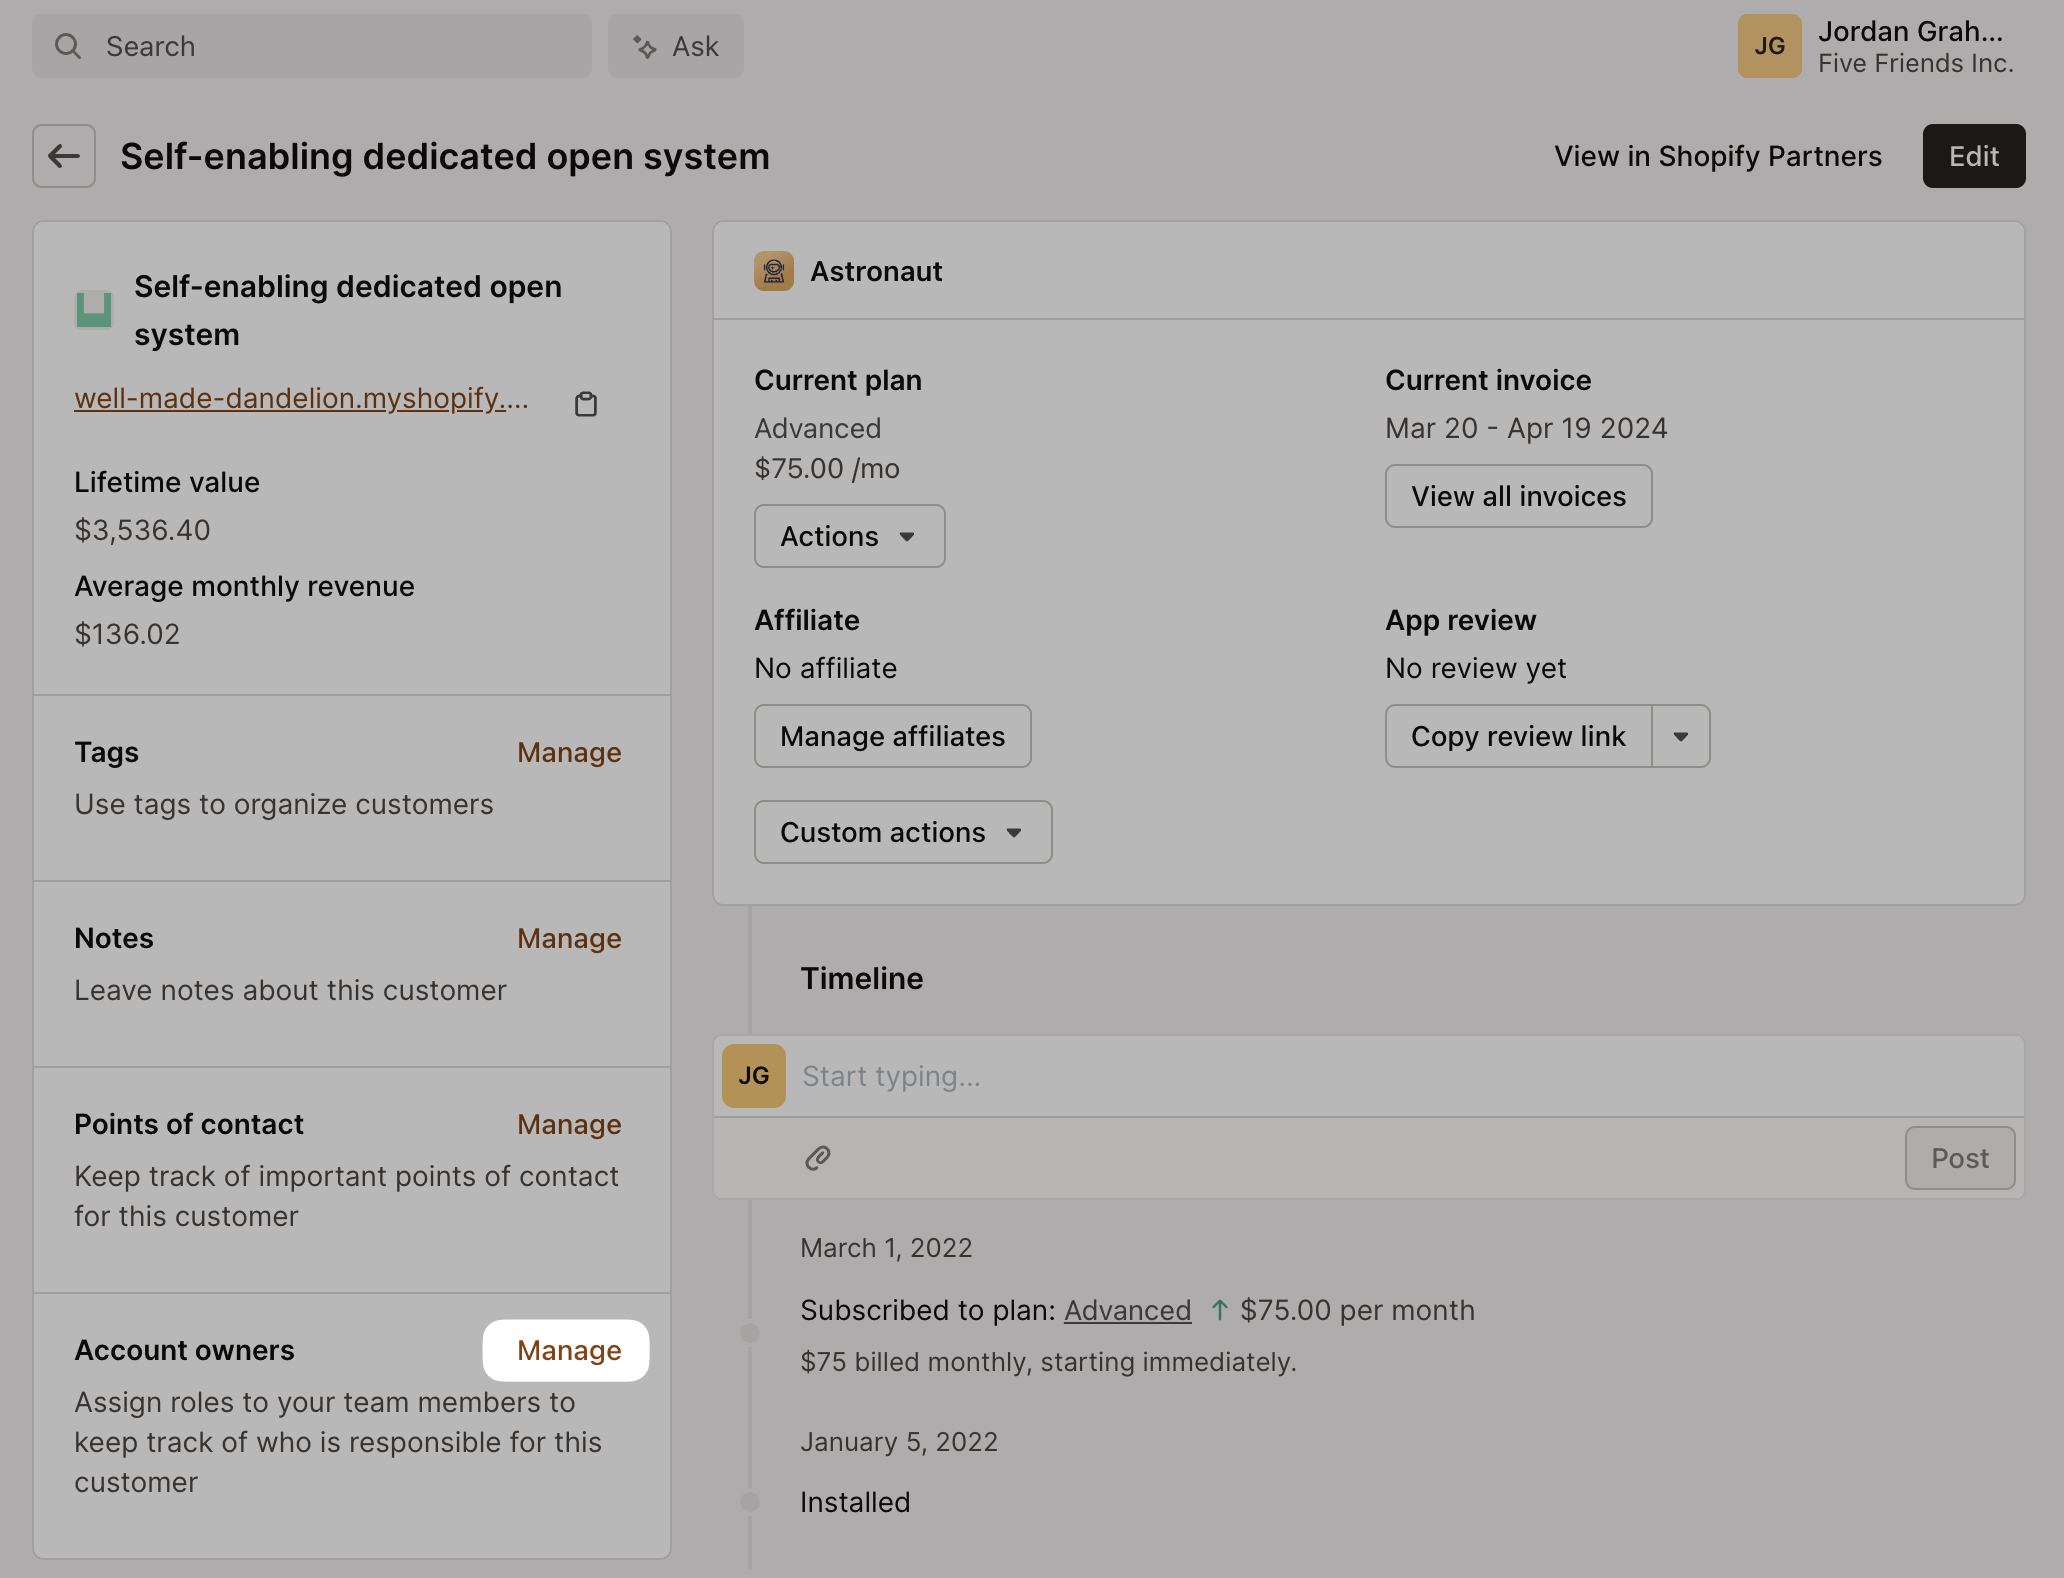
After setting up commissions, assign team members as account owners for specific customers.
Assigning account owners
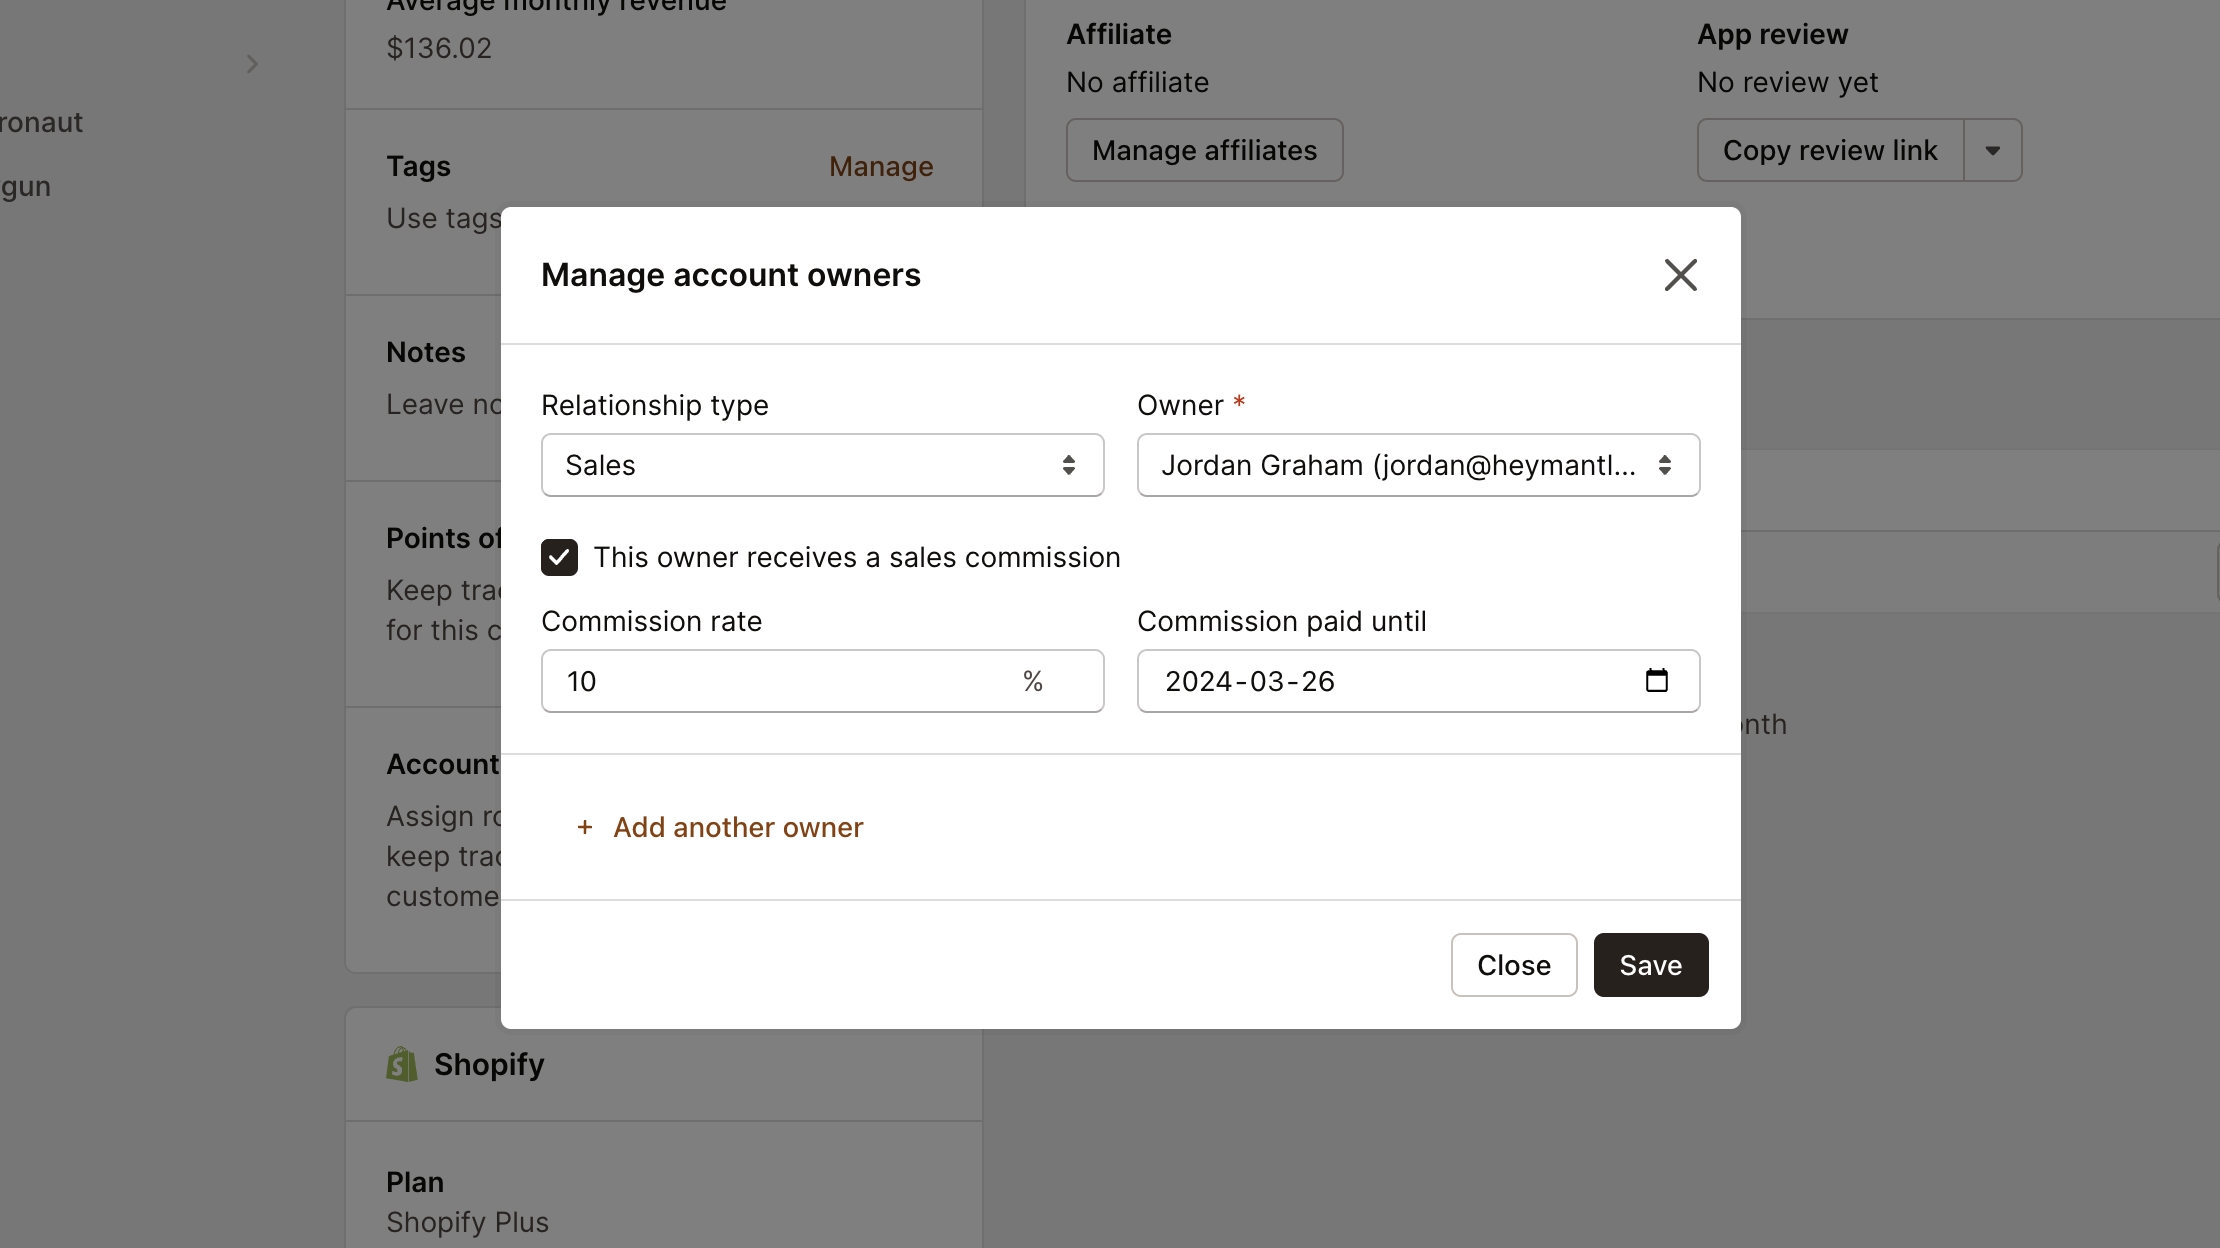
Go to Customers, pick the customer, and find the Account owners section at the bottom left. Click Manage to assign ownership:
Here you can:
- Assign team members as account owners
- Adjust commission settings for specific customers
- See commission history and projections
Tracking commissions
Keep tabs on your team’s commission performance with the Sales Commissions Report. You’ll see:
- Total commissions earned by each team member
- Commission breakdown by customer
- Historical payments
- Future projections
Ready to get your team set up? Head to Settings > Team and start inviting your team!