Get started
Once you’ve got your customers’ emails in Mantle, you’re all set to start sending out those email campaigns!
Setting up email
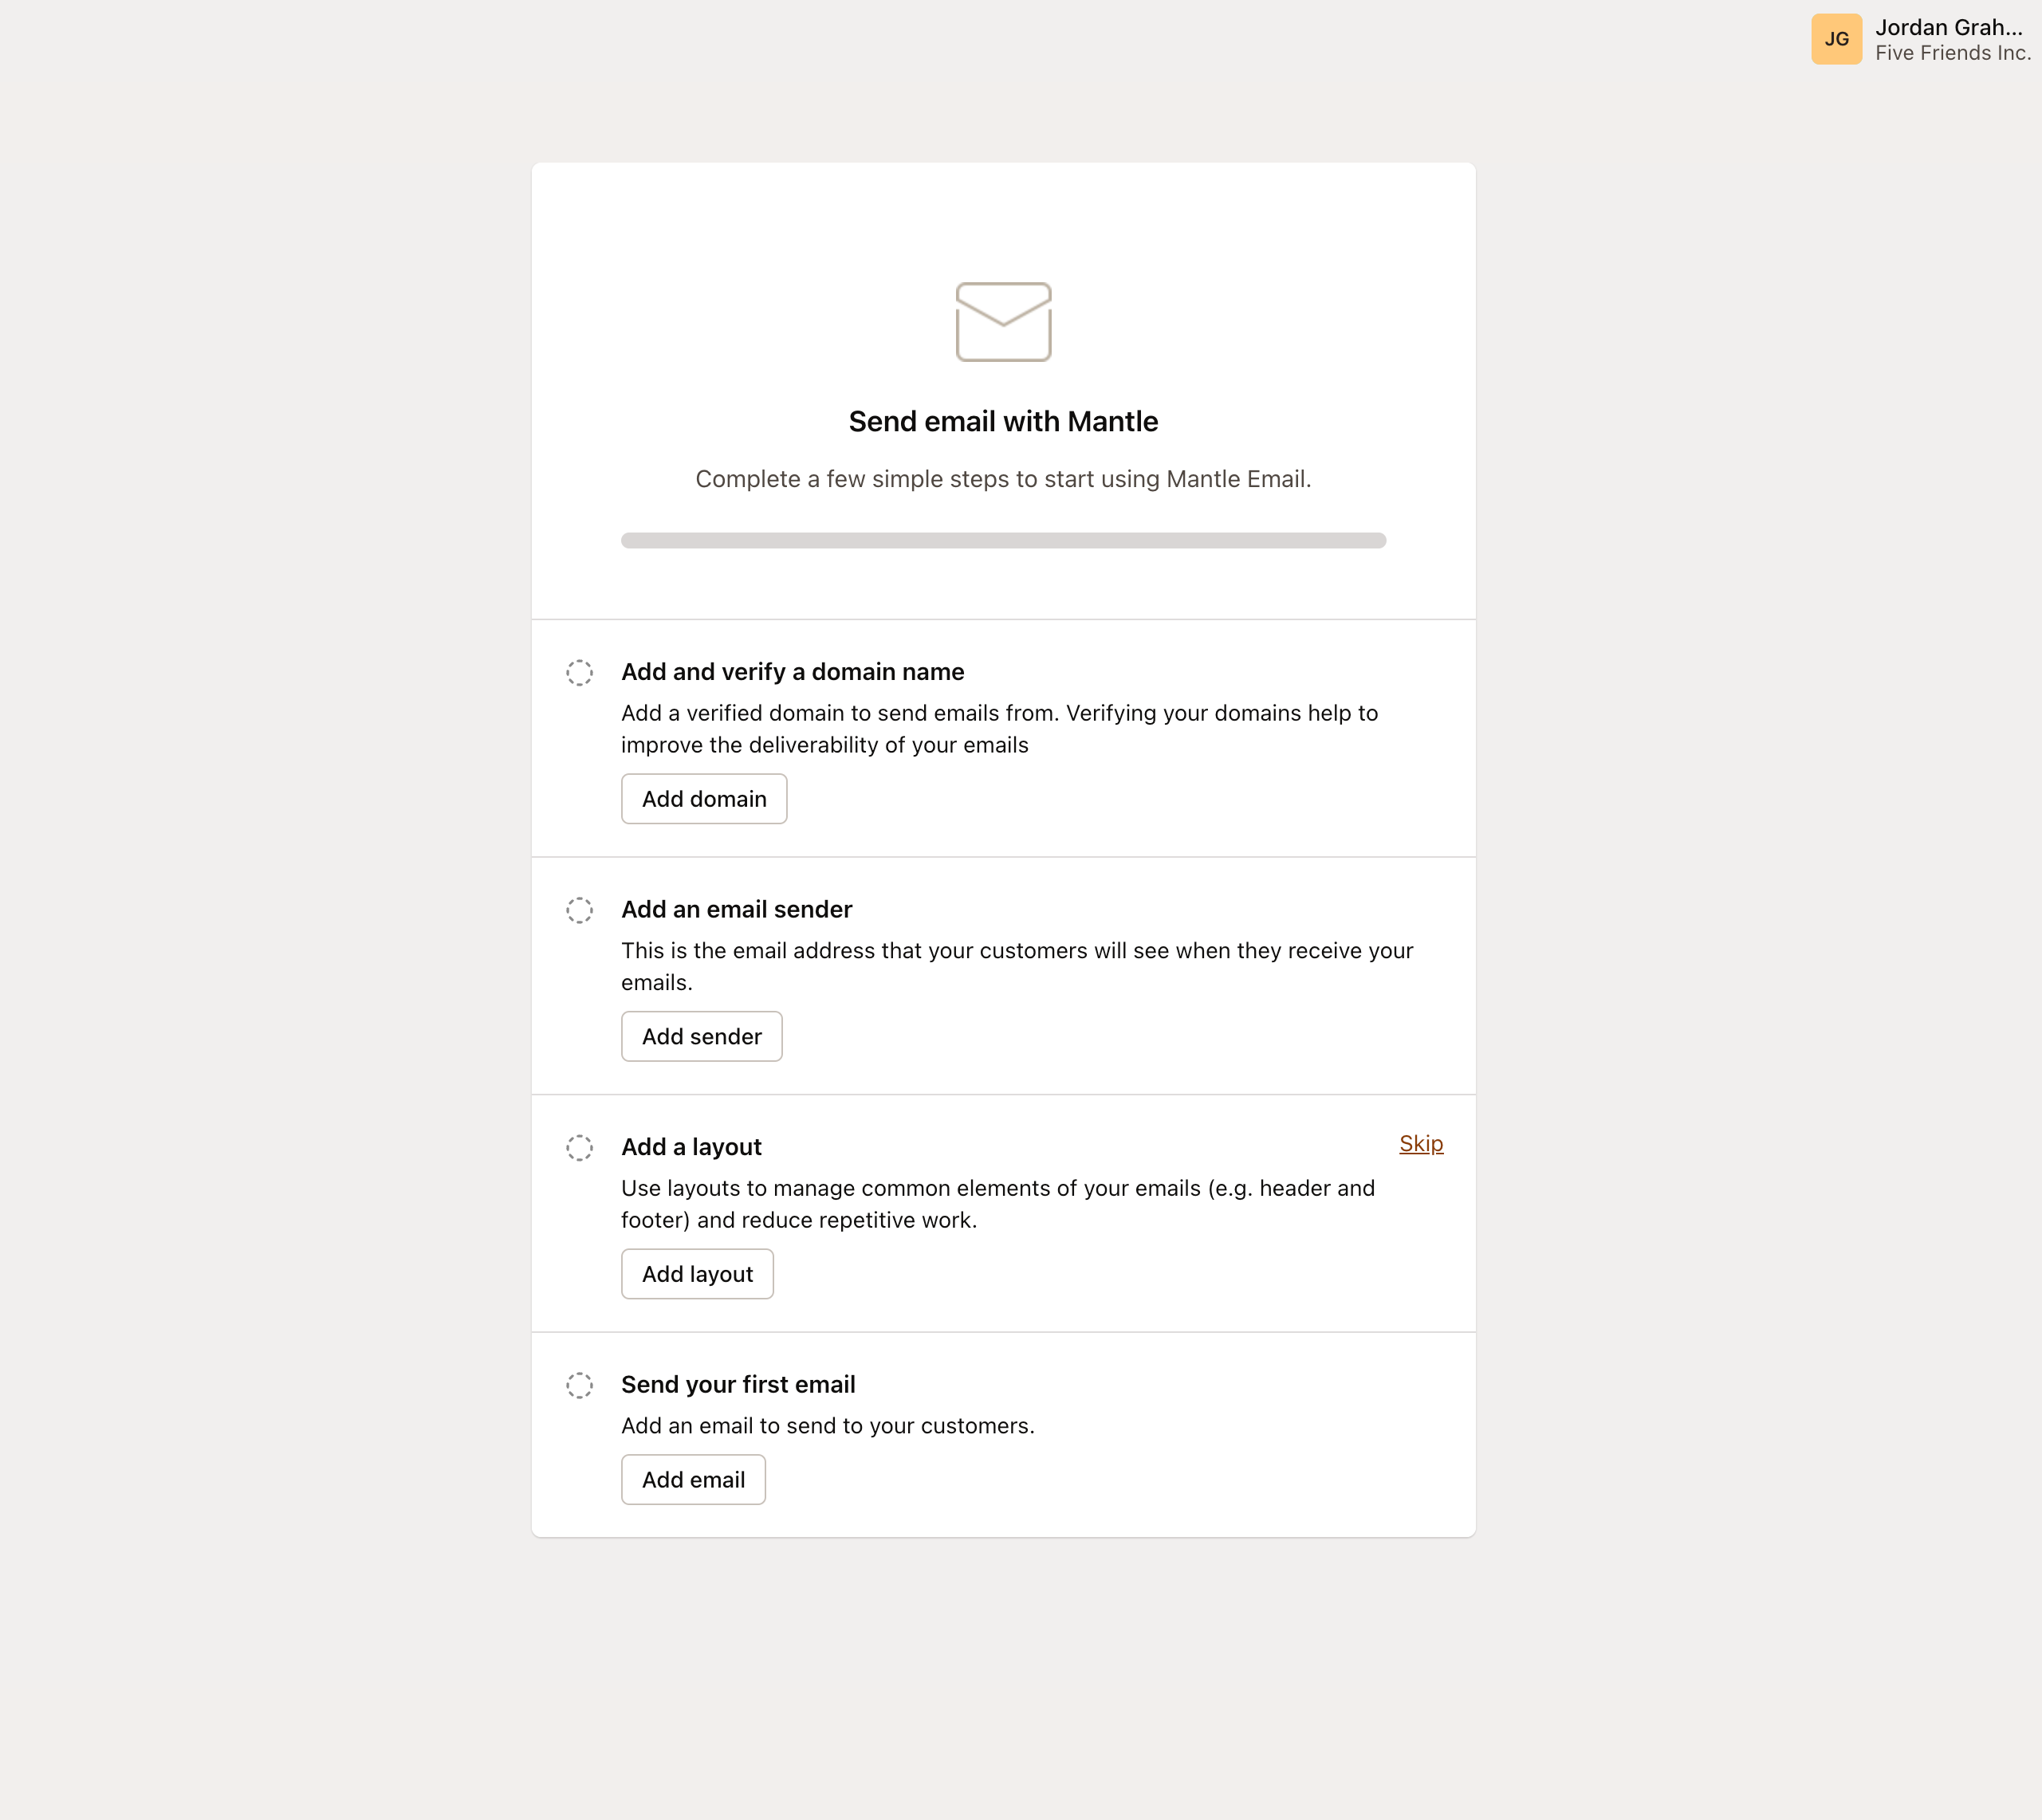
Getting started with Mantle Email is super easy - just head over to the Email section in your app and our onboarding guide will pop up.
It’ll walk you through the setup process step by step, and before you know it, you’ll be ready to send your first email. You’ll be up and running in no time!

Adding your email domain
Your domain is the part of your email address that comes after the ”@” symbol Eg. in “[email protected]”, “yourcompany.com” is the domain.
You can add verified domains to send emails from. Verifying your domains help improve the deliverability of your emails.
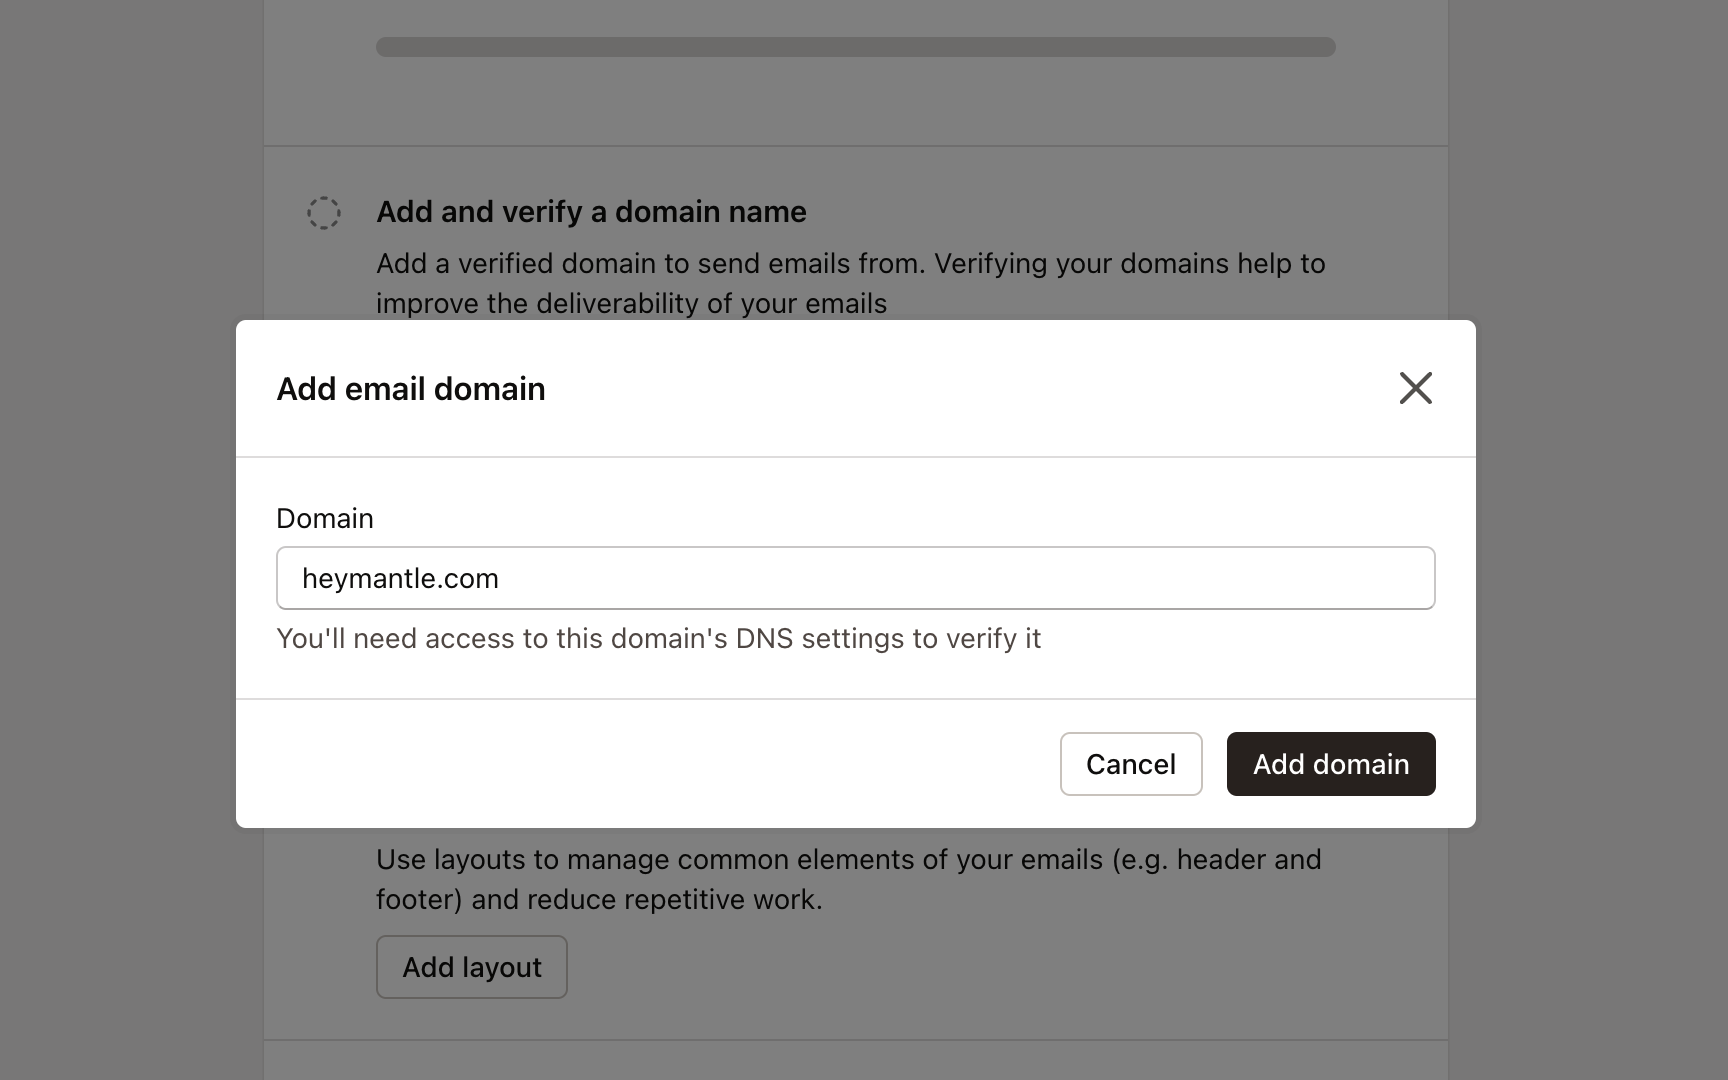
Click Add domain to enter your domain name:

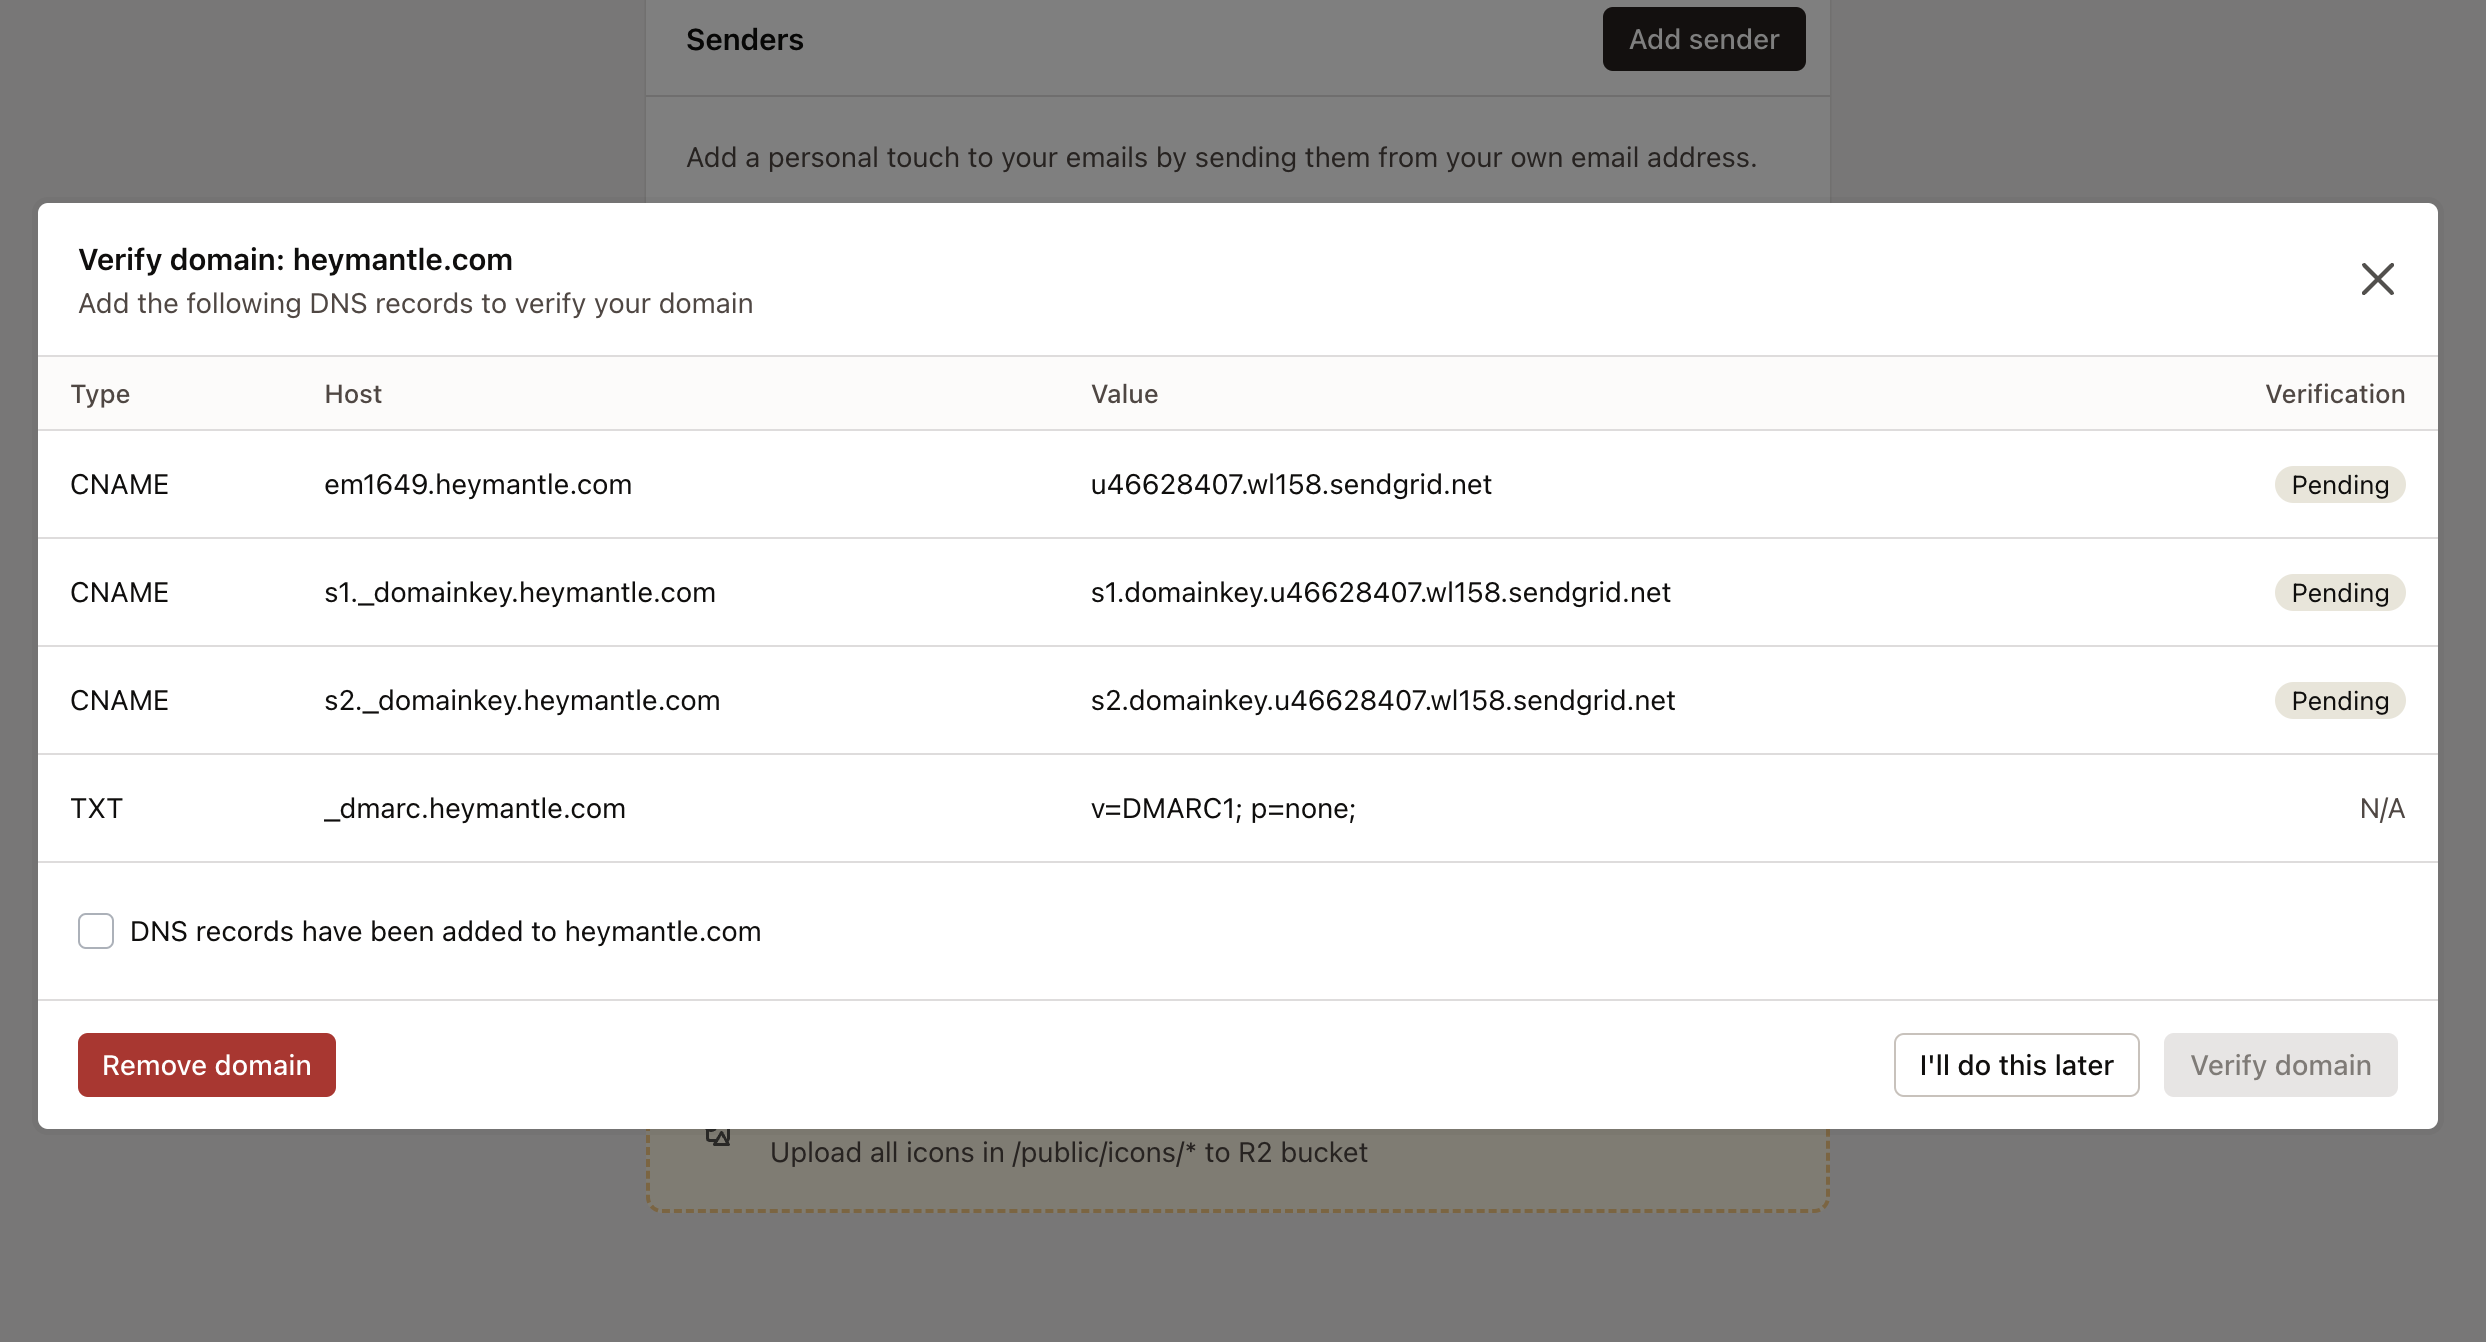
Once you’ve added your domain, a screen will pop up with verification settings:

These settings include DNS records that you’ll need to add to your domain. Head over to your domain provider’s website (like GoDaddy.com) and log in. Look for the DNS management section and add the new records we’ve provided.
These records act as a digital handshake, proving you own the domain. After you’ve added them, your domain will be verified, giving your emails a better chance of landing in inboxes.
As an example, here’s a handy video guide for GoDaddy. Using a different domain provider? No worries - just look up their instructions for managing DNS settings.
After adding the DNS records to your domain provider, head back to Mantle and:
- Check the box that says DNS records have been added to heymantle.com
- Click Verify domain to complete the process
Troubleshooting domain verification
If your domain verification fails, here are the most common issues and solutions:
Domain auto-add issue Some providers auto-add your domain when creating records. Try using the value (e.g. s1._domainkey) without your domain to avoid doubling up.
Existing DNS records If your domain already has conflicting DNS records for email (like existing DKIM or SPF records), you may need to update or remove those first before adding Mantle’s records.
Use a subdomain If problems persist, try using a subdomain like mail.yourdomain.com instead of your main domain. This avoids conflicts with existing email setups and is often the cleanest solution.
Adding your email sender
A sender is the full email address used for sending campaigns, which includes both the part before and after the ”@” symbol, and must be based on a verified domain.
A sender is the full email address used for sending campaigns, which includes both the part before and after the ”@” symbol, and must be based on a verified domain.
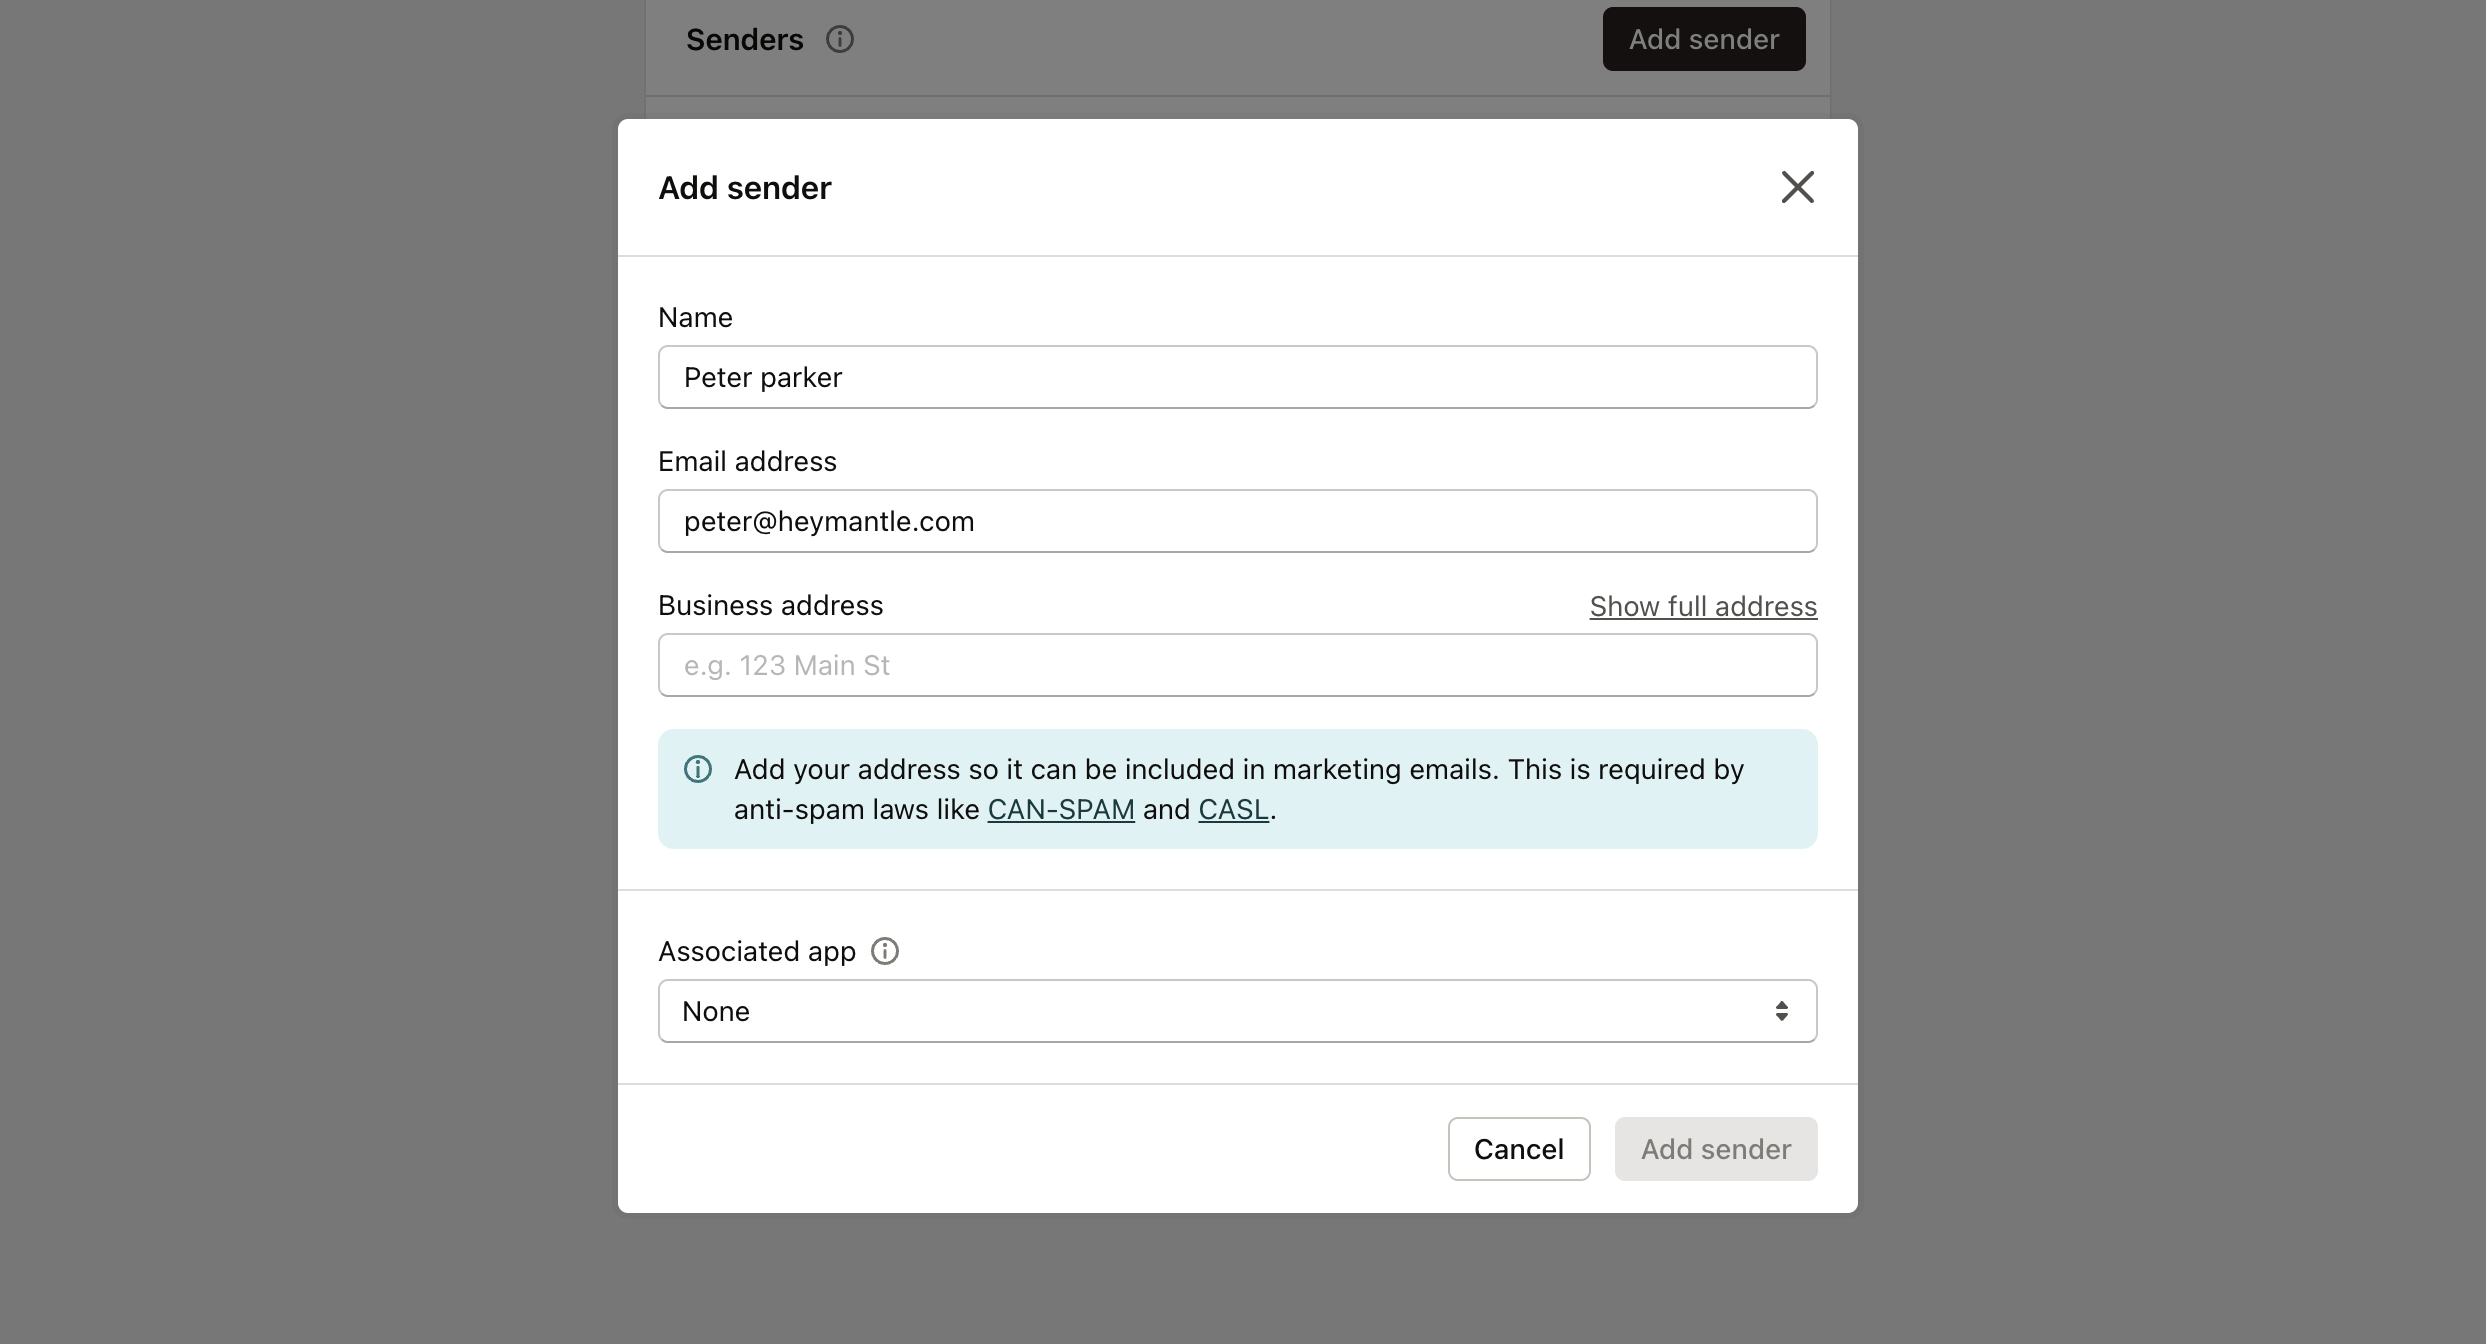
Click Add an email sender to enter your sender details. A popup will appear, prompting you to provide the following information:
- Sender name
- Email address
- Physical address
- The app you’d like to associate with this sender

Next: Creating your email