Hosted billing
Hosted billing allows you to create highly detailed and customizable billing pages for your customers, enabling you to show in-depth billing data on a personalized page tailored to your brand’s unique needs.
Key features
- Display your customer’s current plan and available upgrade options with core features
- Provide detailed usage information, showing how customer activities relate to pricing
- Add customizable banners and specific information to enhance communication
- All within an intuitive drag-and-drop editor, making it easy to create and manage these pages without technical expertise
To access your Hosted Billing editor, navigate to Your app -> Plans -> Hosted Billing in the left navigation bar.
Drag & drop pages
Hosted billing provides two distinct pages that you can add to your app to display billing and plan details to your customers, all created with an intuitive and easy-to-use drag and drop editor:
Plan list
Allow your customers to view available plans, explore their features, highlight the benefits of their current plan, and guide them to upgrade to new plans that may better suit their needs.

Display and presentation
- Flexible display options: Showcase all, public, or custom plans to suit different customer segments
- Text customization: Enhance readability and presentation with adjustable text styles for names, descriptions, and prices
- Highlight trial periods: Attract new users by prominently displaying trial days as a feature
- Custom columns: Tailor the information displayed by overriding default columns
Engagement and promotion
- Promote key plans: Highlight recommended plans using the “recommended” custom field to guide customer choices
- Custom call-to-action: Increase engagement by modifying the call-to-action with the “buttonLabel” custom field
Account summary
Provide your customers with a detailed overview of their account, including billing history, current plan details, usage statistics, and important account information.
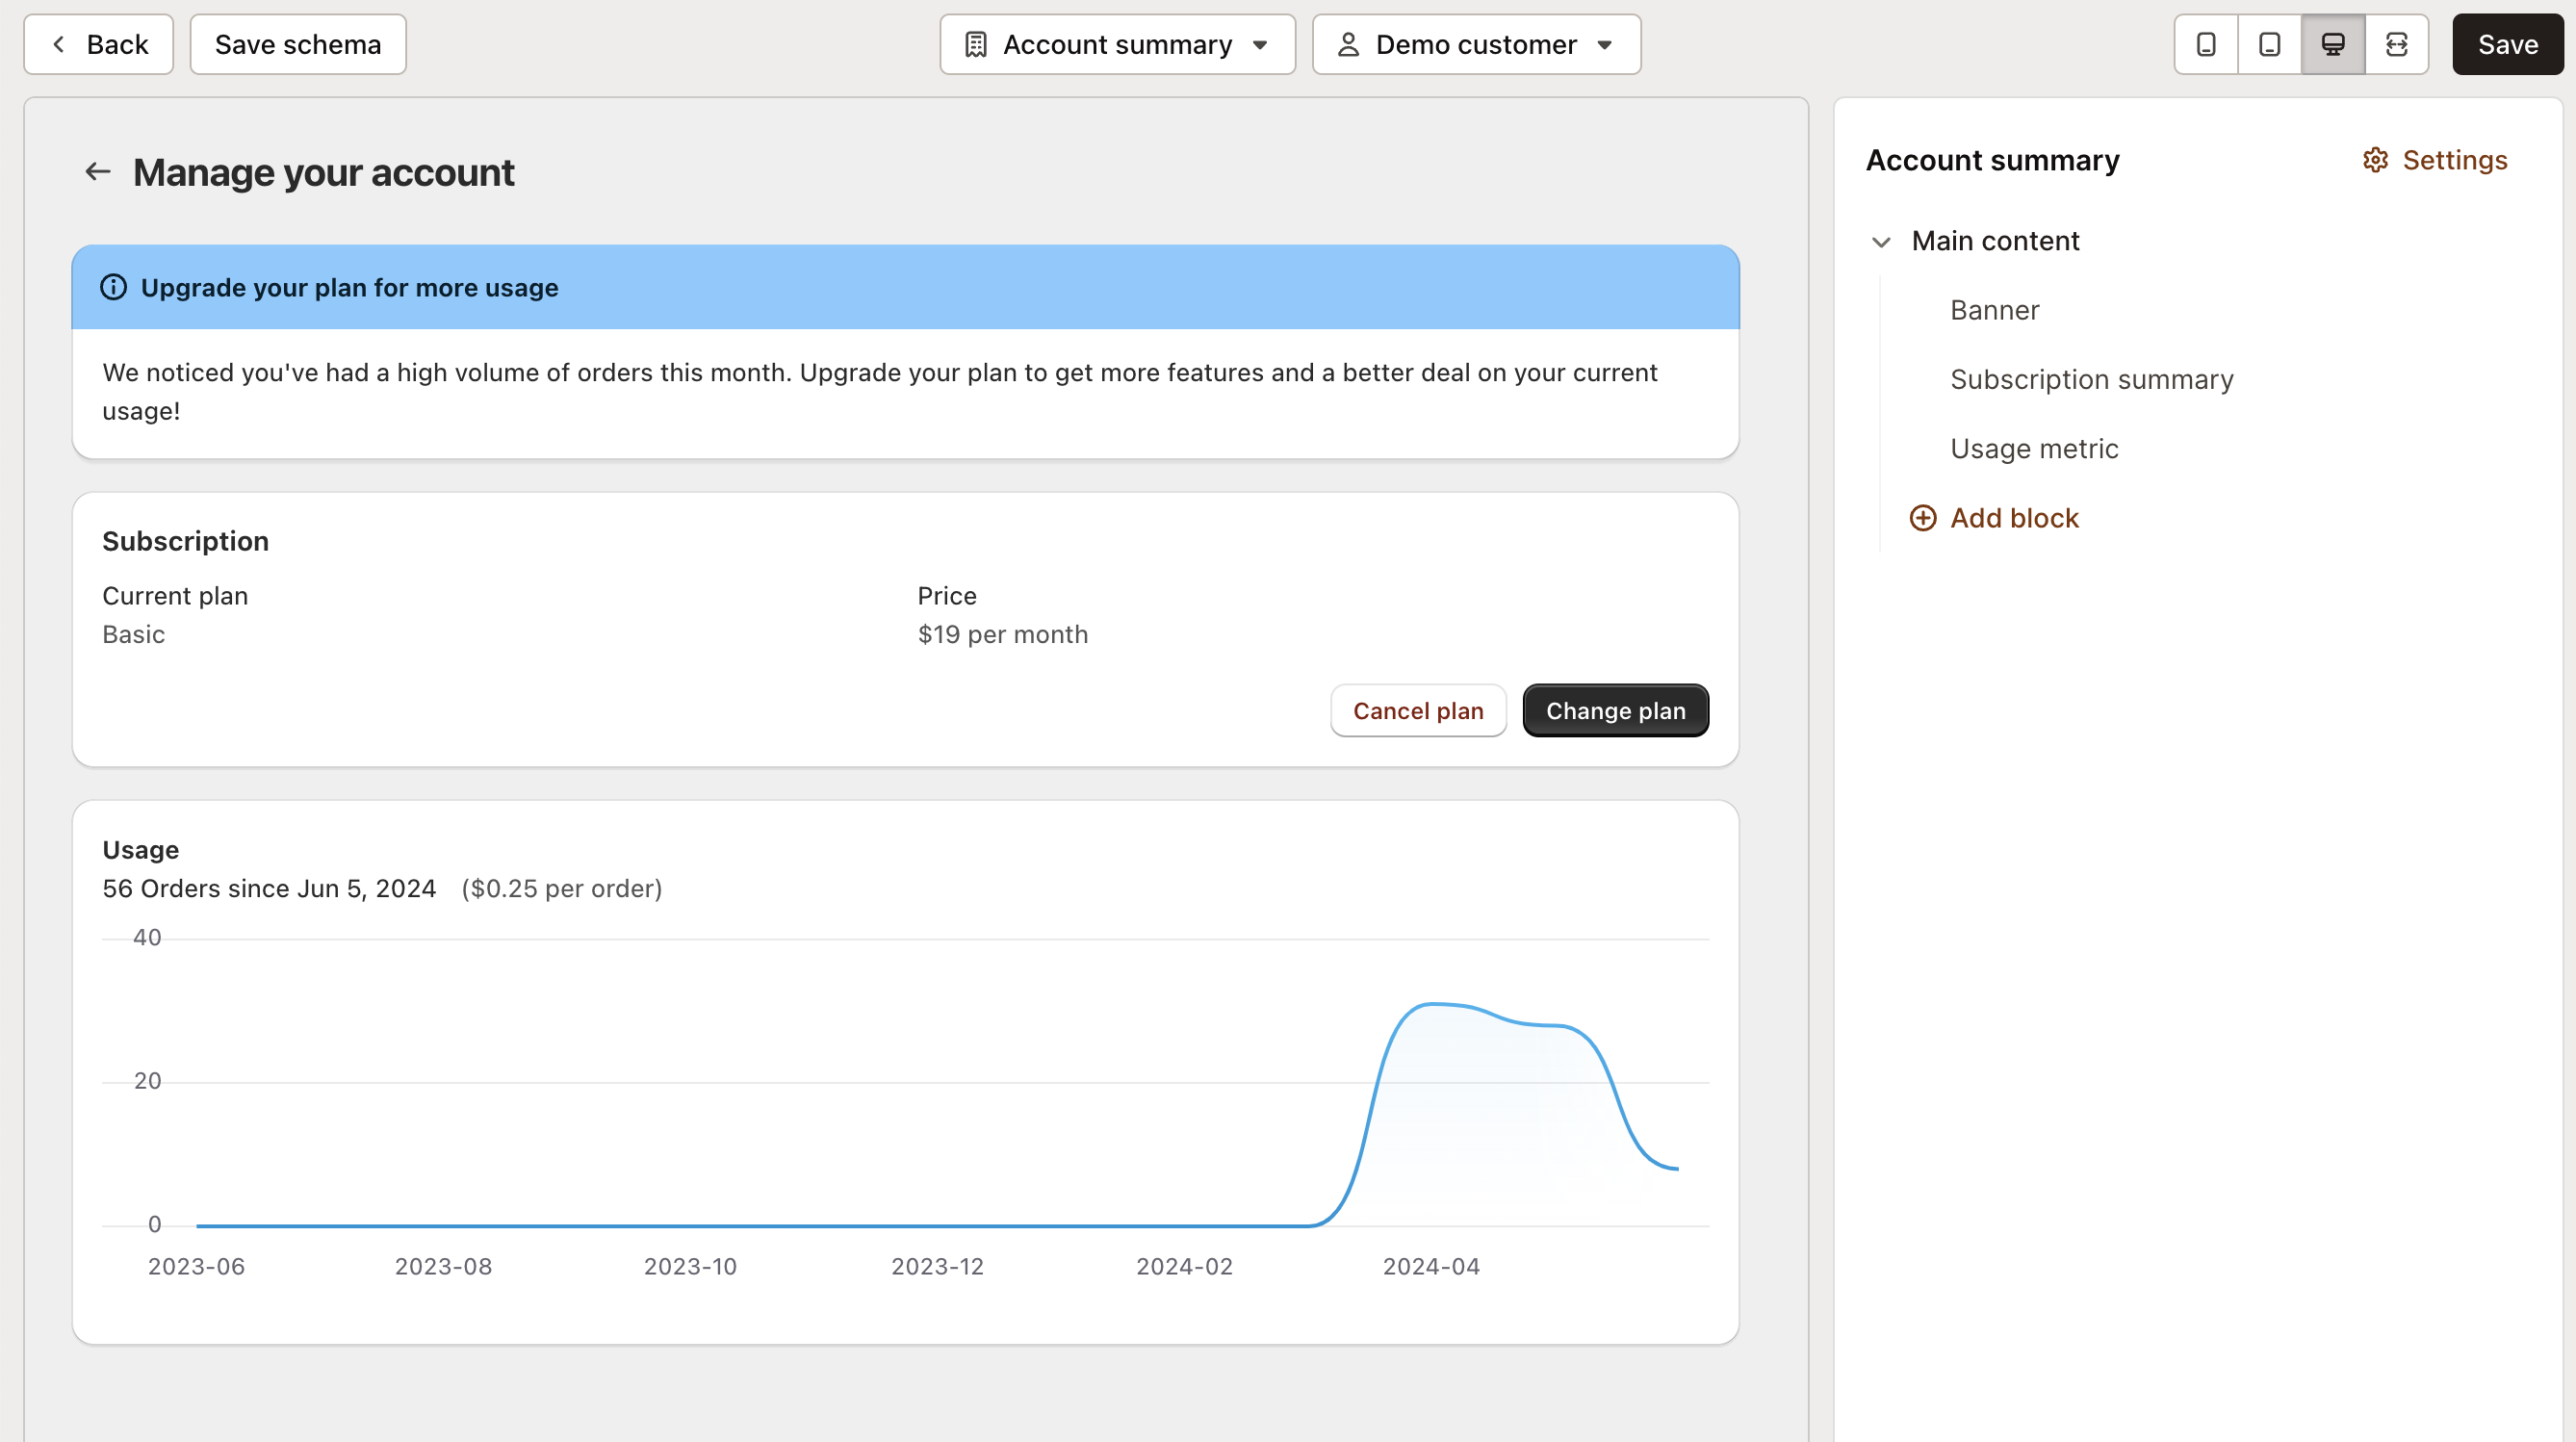
Subscription management
- Subscription summary: Display detailed information about the customer’s current subscription plan
- Usage metric: Provide insights into the customer’s usage, highlighting any relevant metrics
- Limit metric: Display limit usage metrics related to the customer’s plan
Customizable components
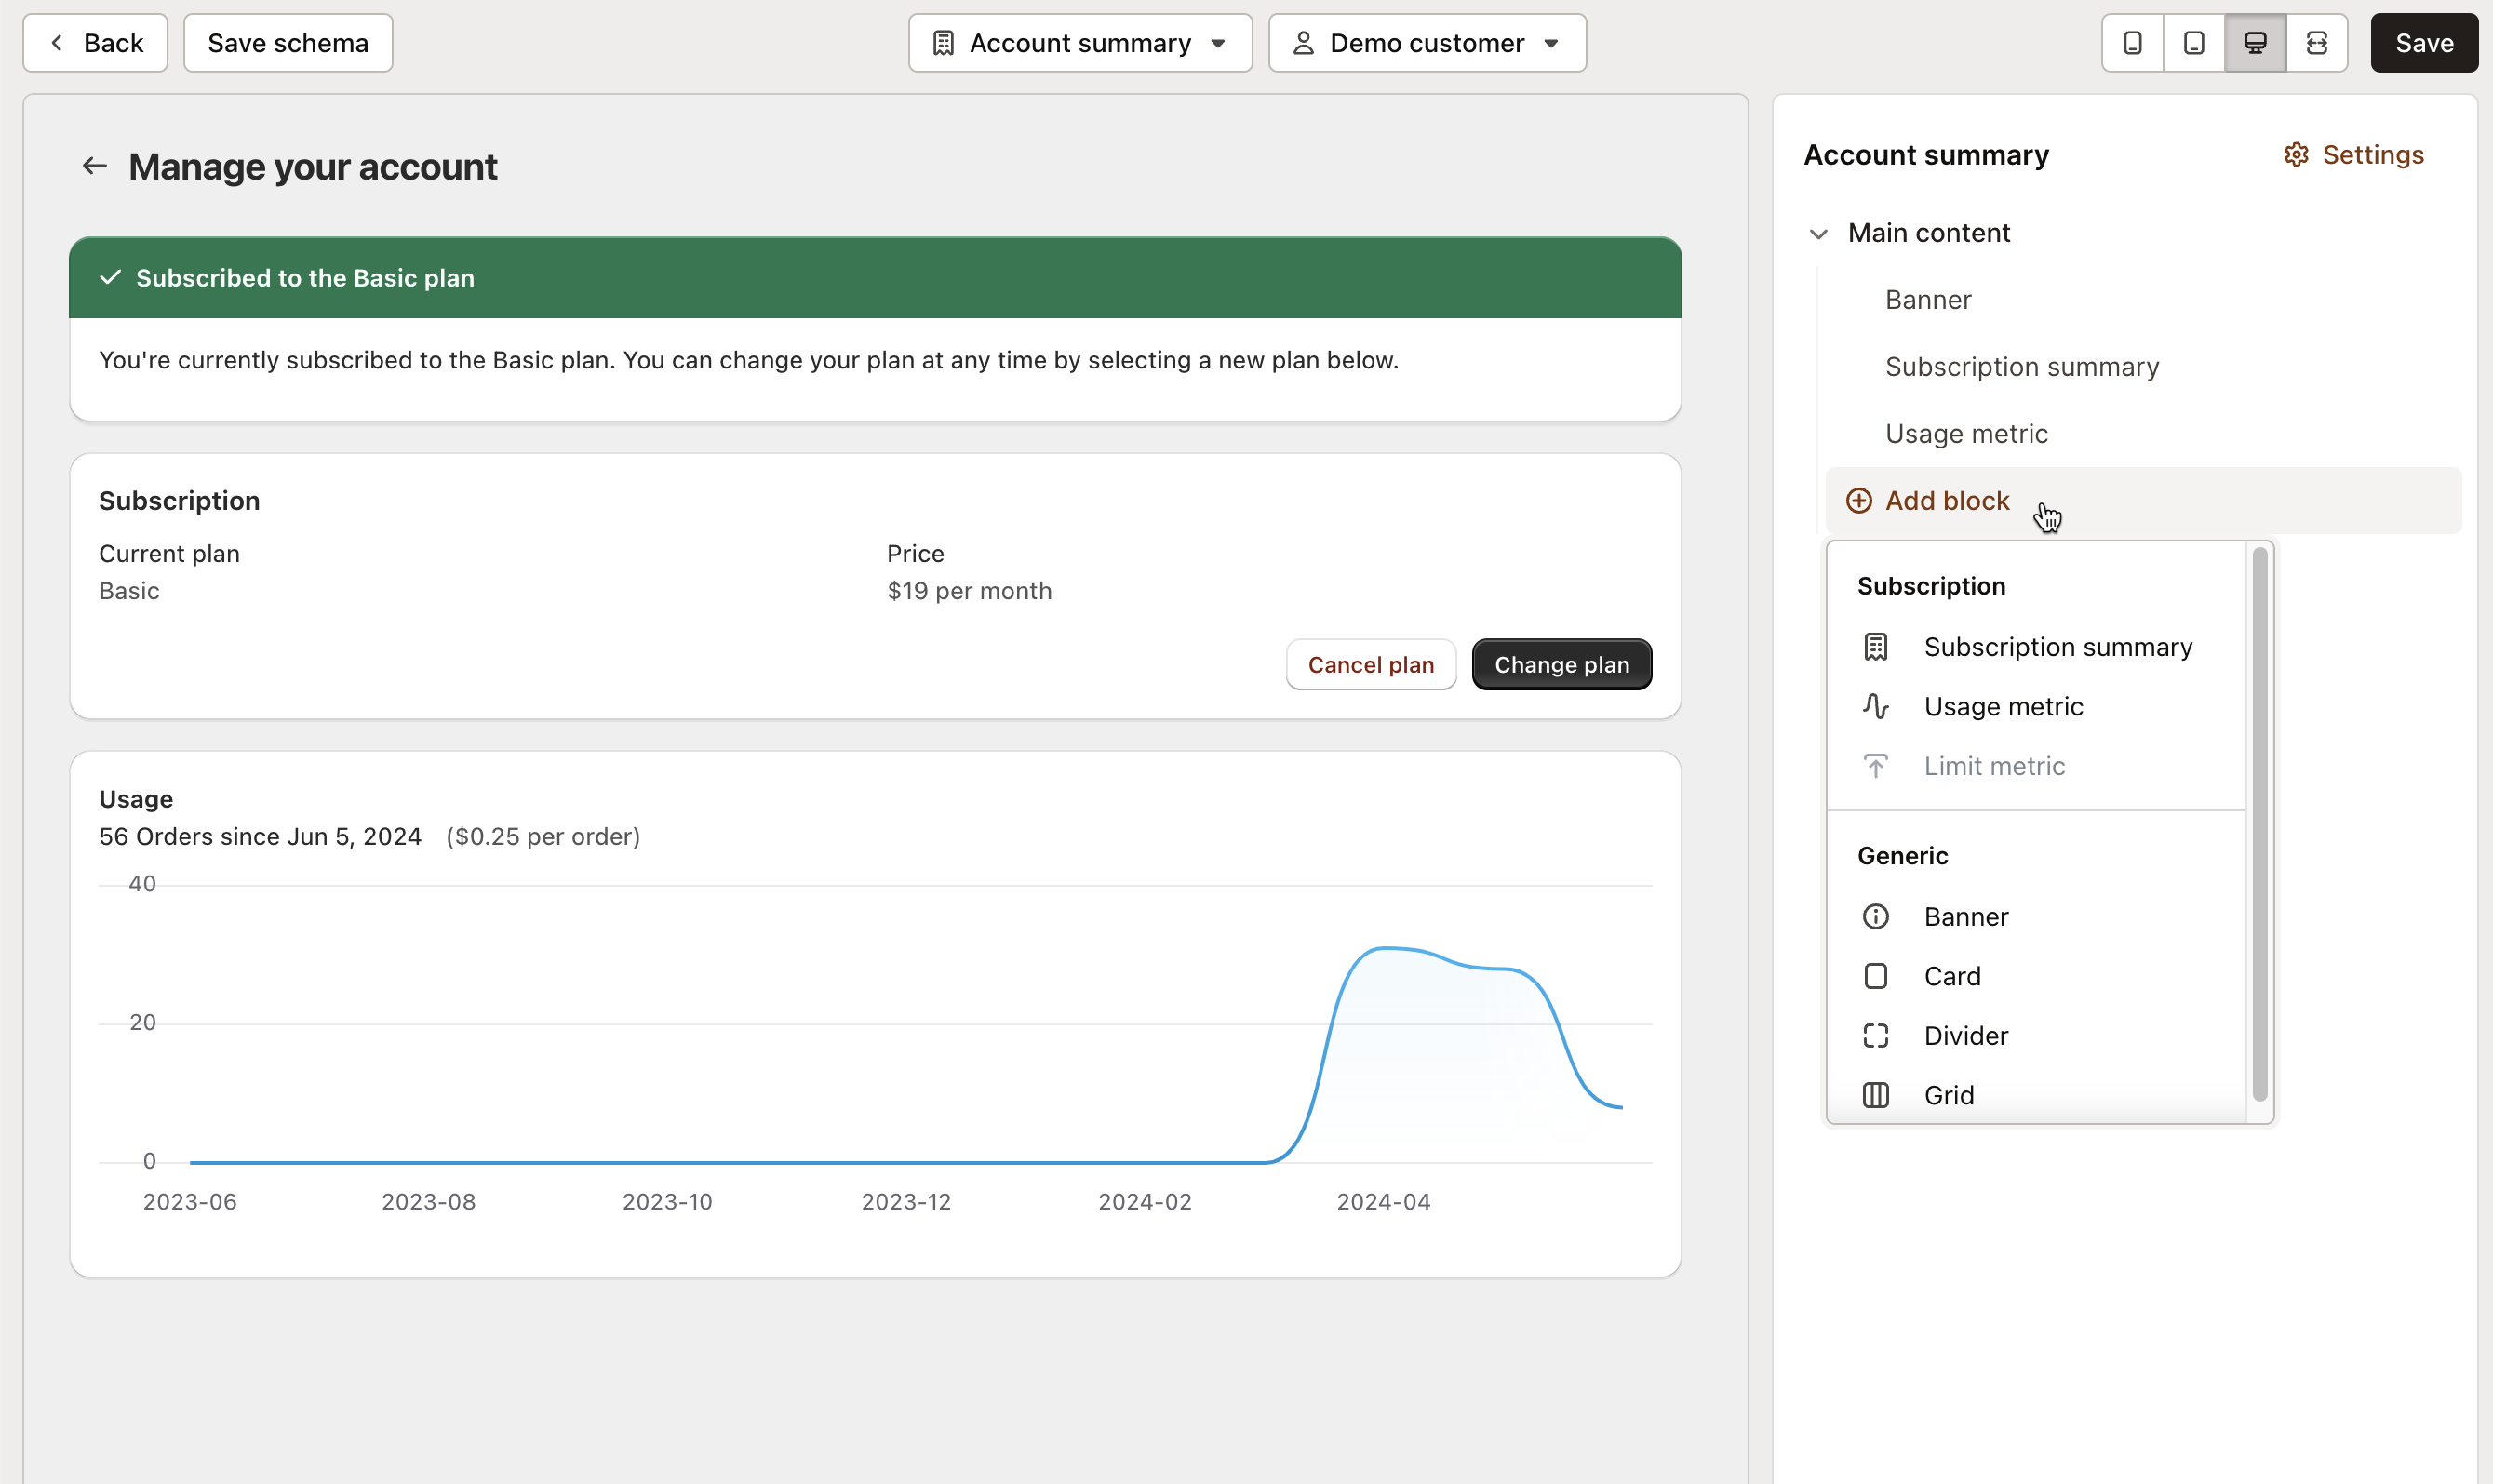
- Banners: Add informational banners to highlight important updates or messages
- Cards: Display customer information flexibly, allowing you to present the content in a way that best suits your needs
- Dividers: Insert dividers to separate different sections for better readability
- Grids: Utilize grid layouts to organize information systematically
Selecting pages and customers
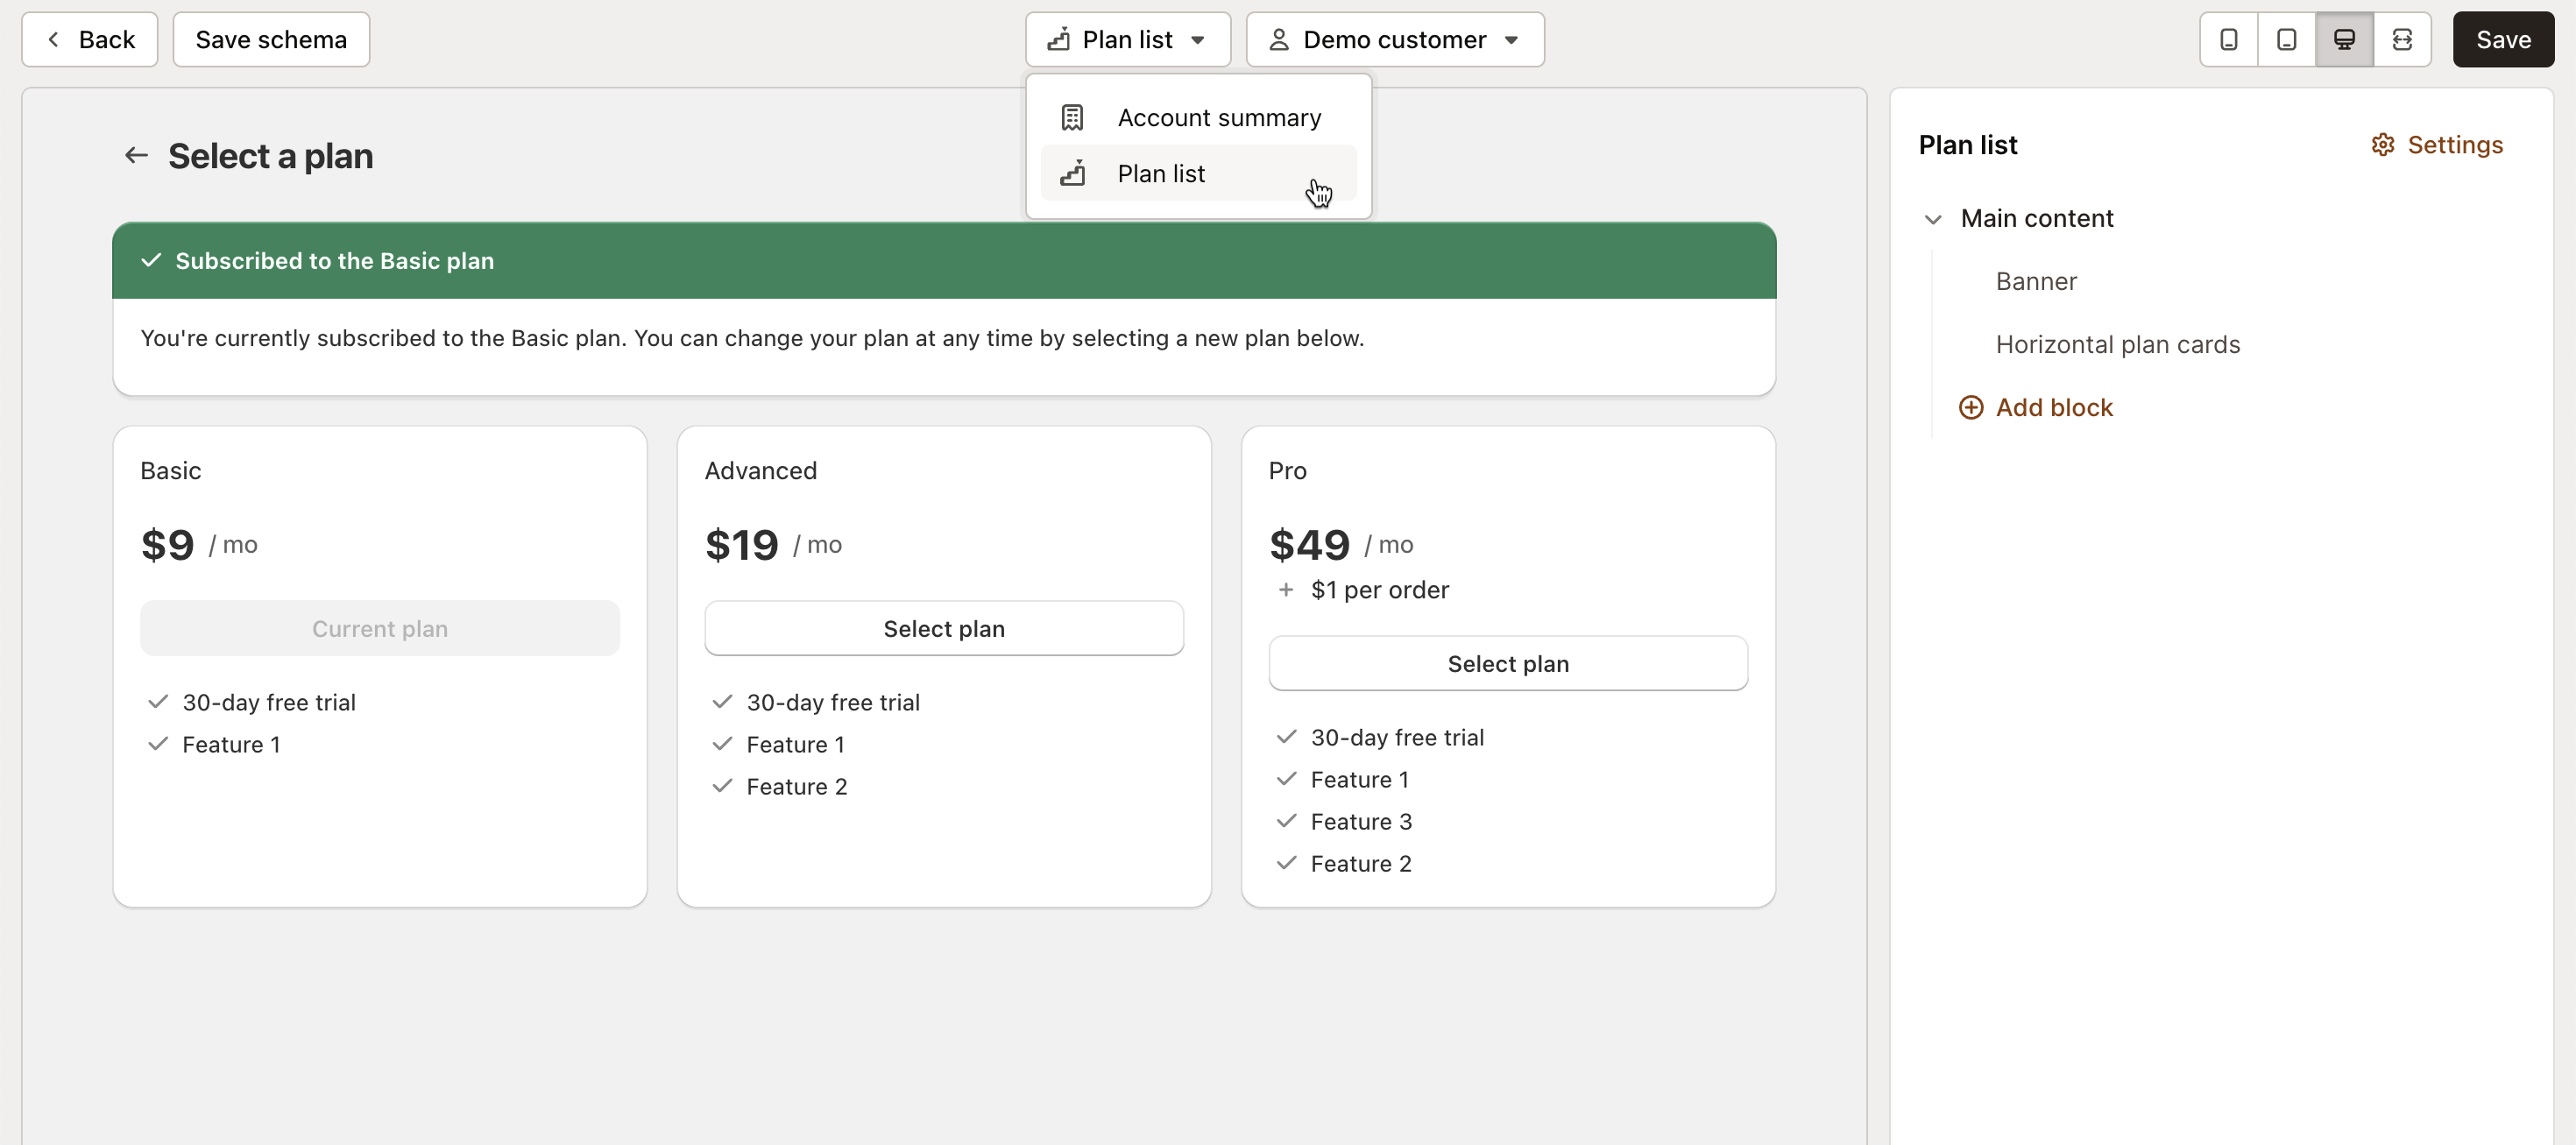
You can easily switch between pages and select customers to see how their plans are displayed and what the page looks like for each specific customer.
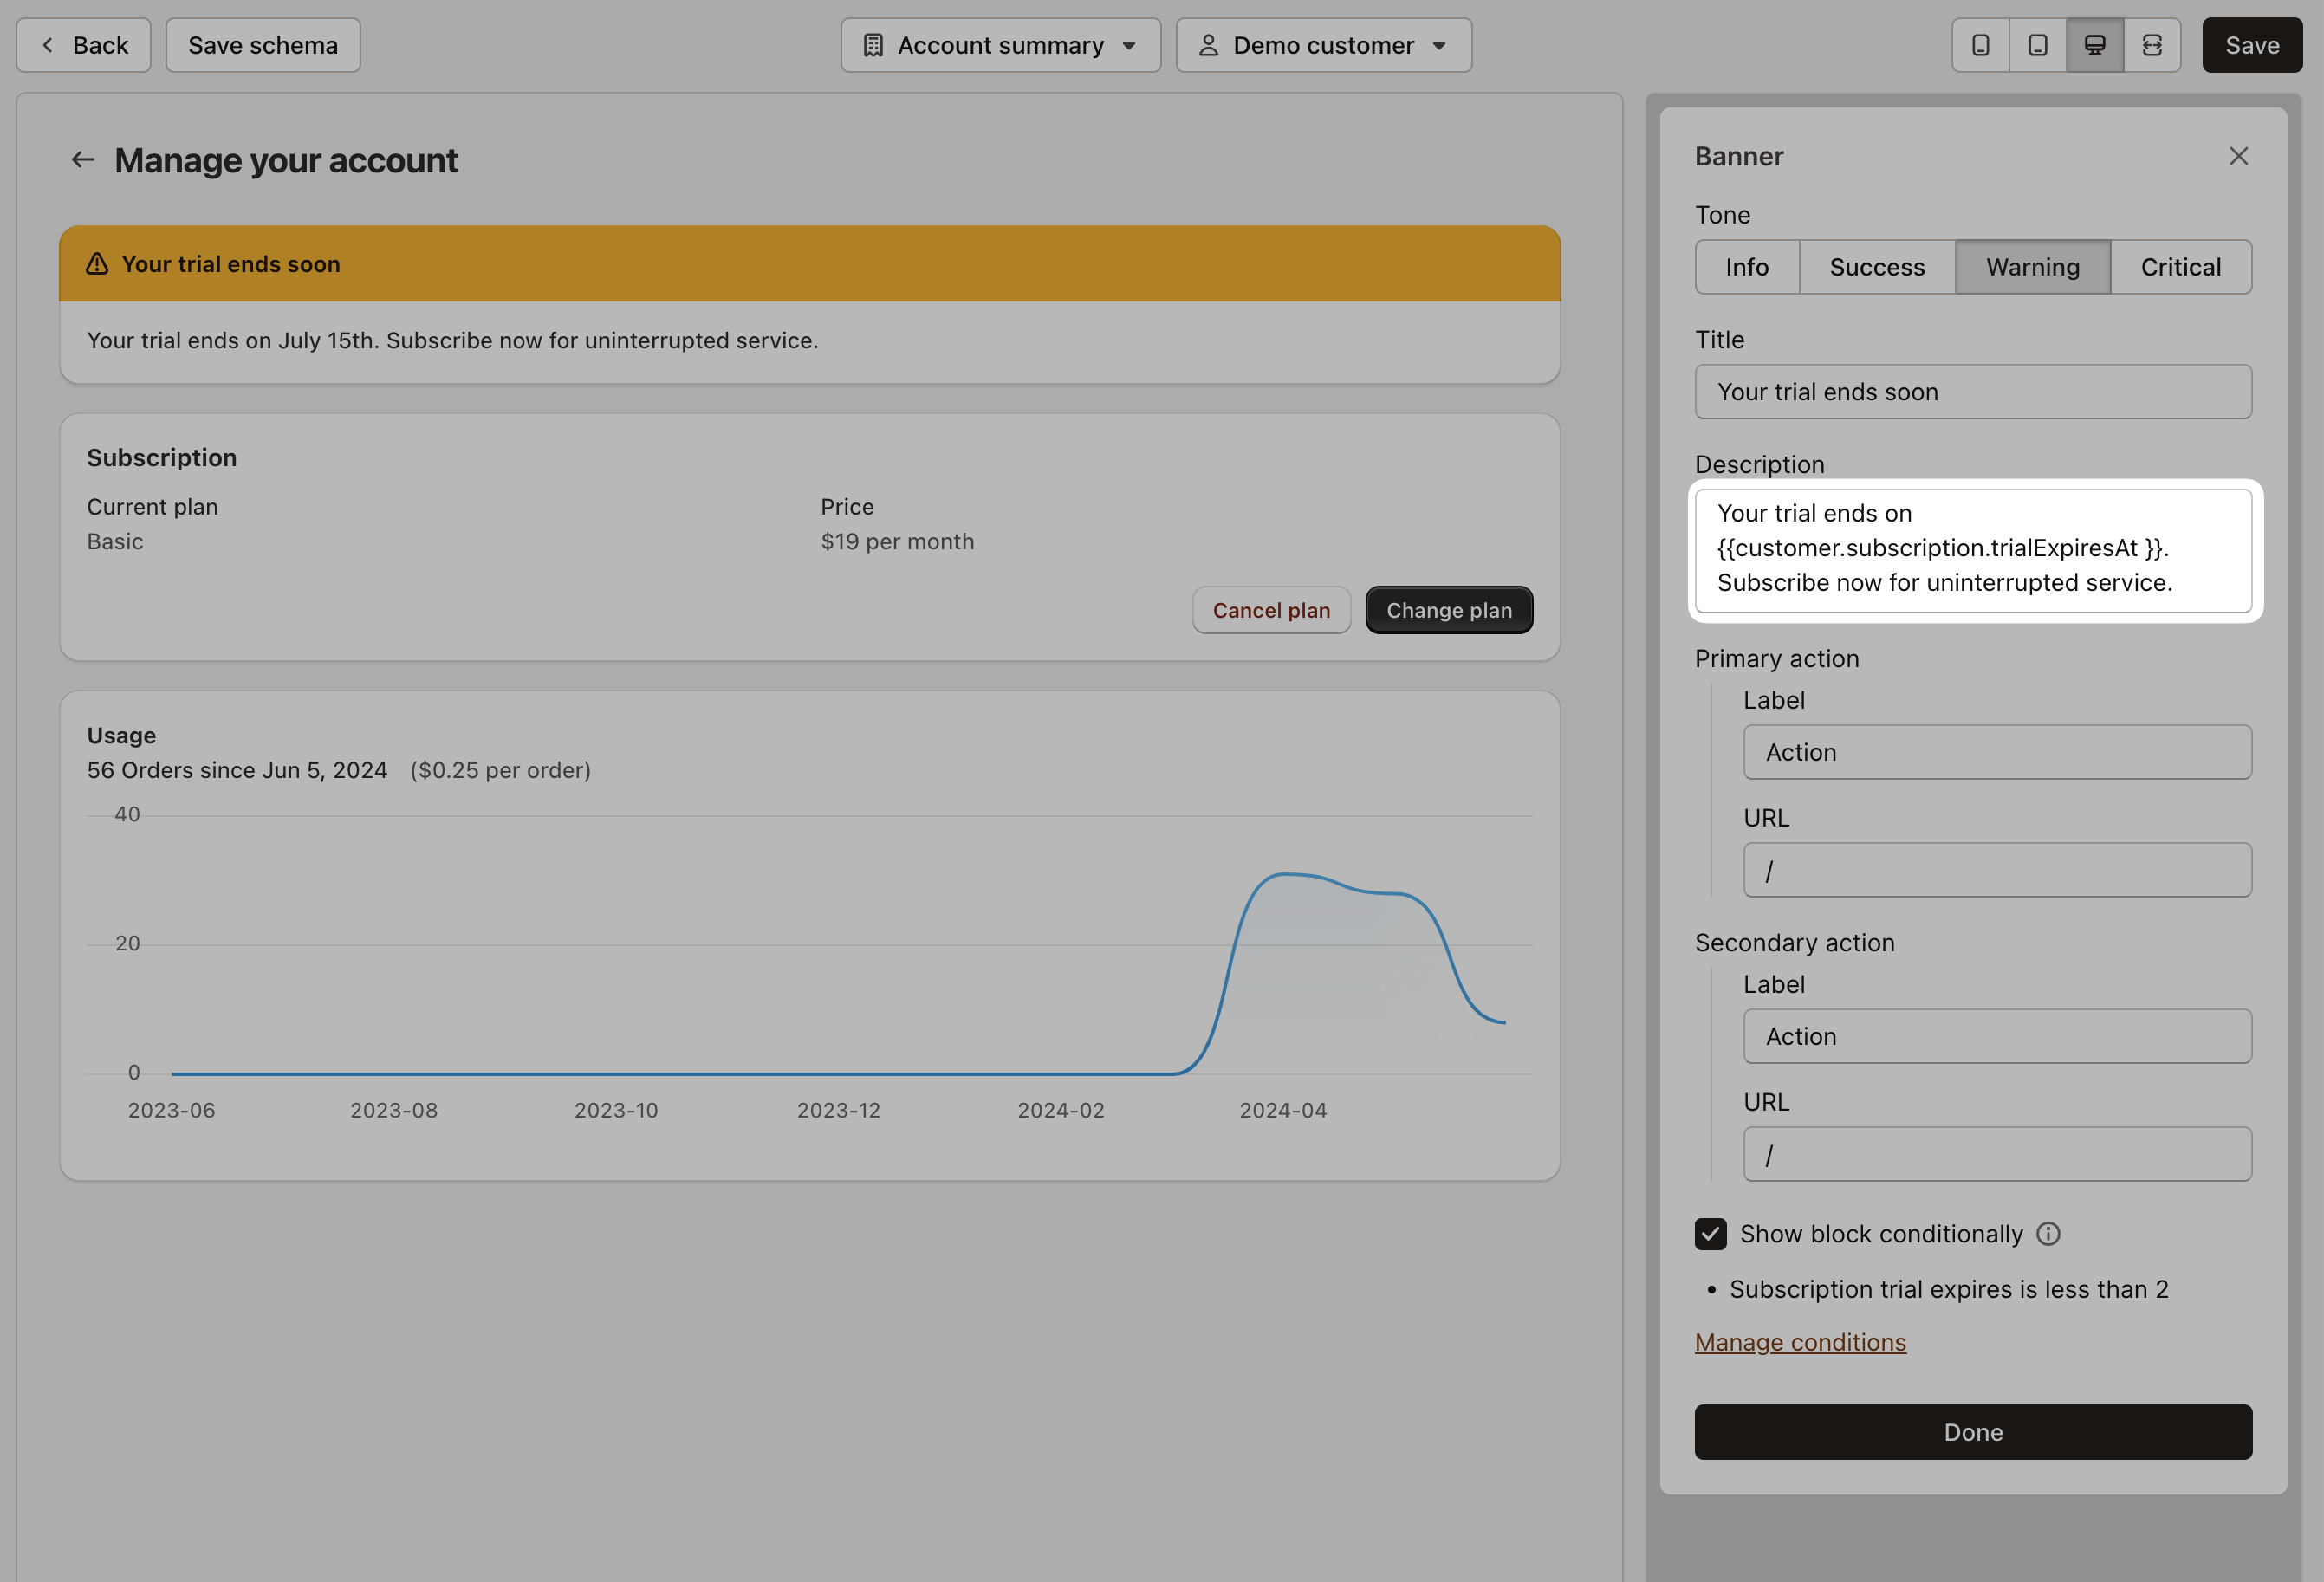
Conditional rendering
You can set up conditions to render blocks based on specific criteria, ensuring they are displayed only when all conditions are met.
To set up conditions, select your block and click Manage conditions. From there, you can add as many conditions as you need:
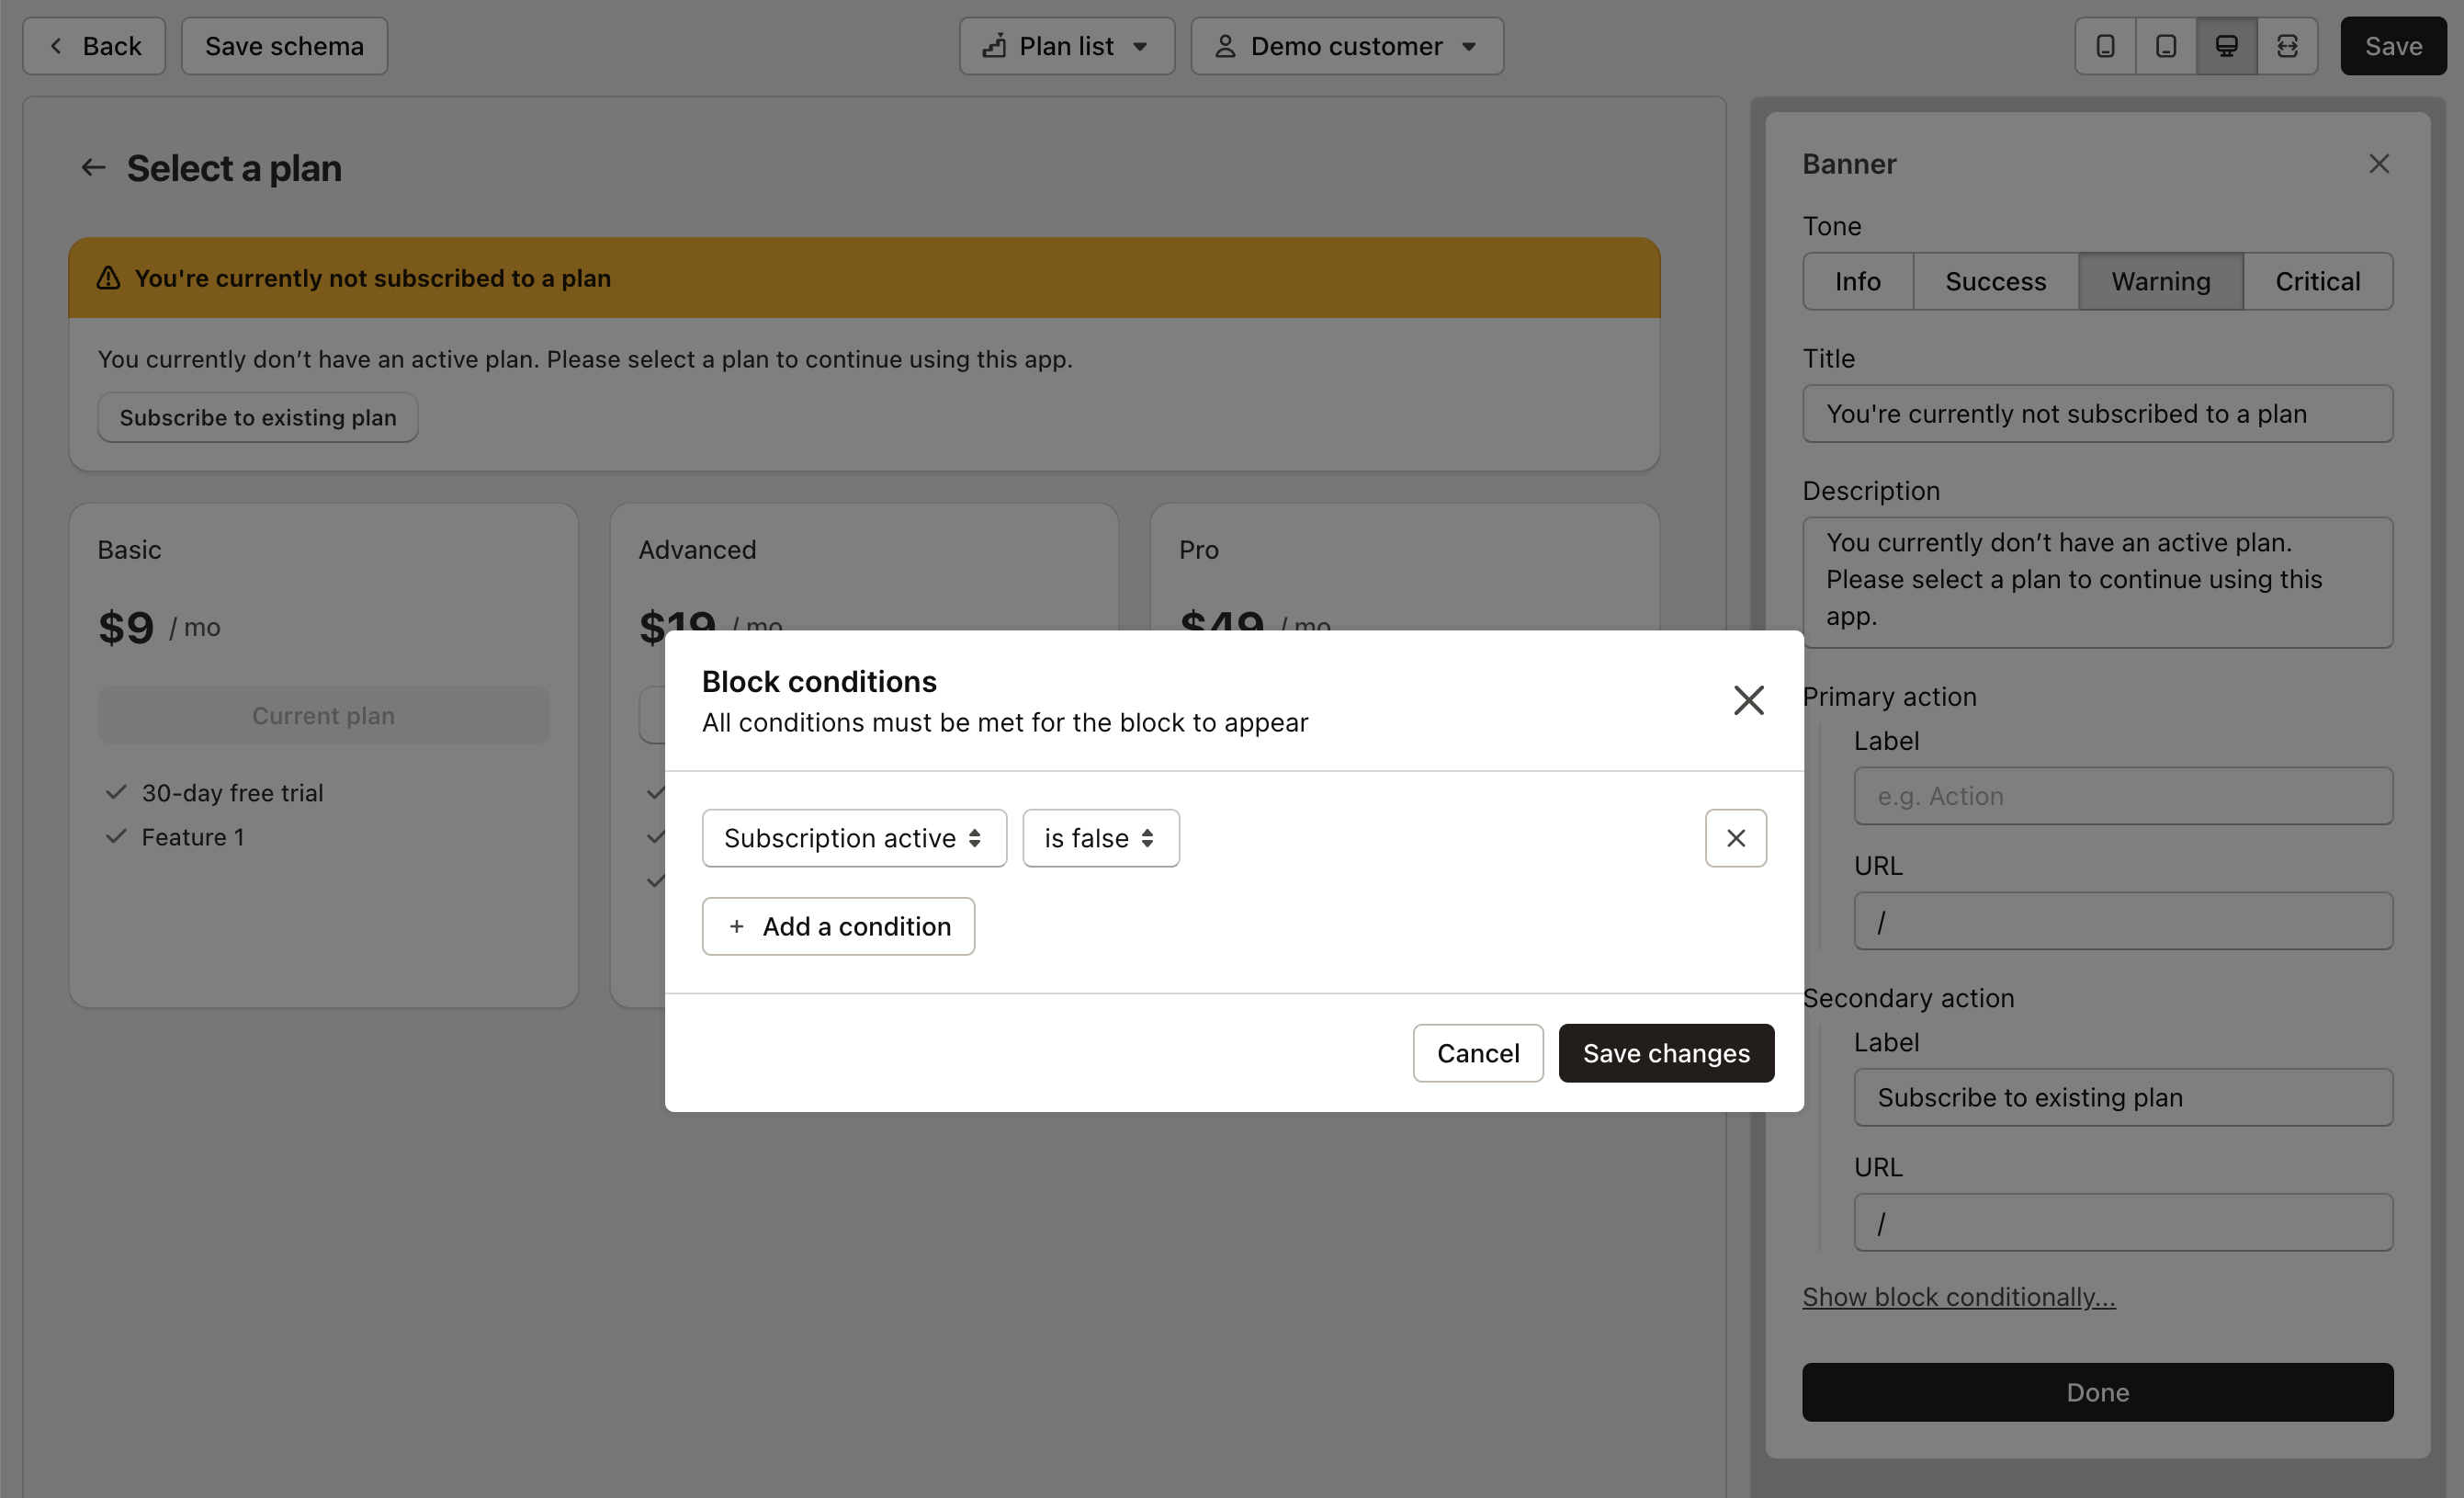
Once the conditions are set and met, the block will appear on the page for your customer.
Using liquid variables
You can also use Liquid variables to enhance your text and CTAs, making them more dynamic and impactful.
Liquid variables are available for the following objects:
- customer
- subscription
- plan
- plans
- features
Each of these objects corresponds directly to the app API response.
Simply add a Liquid variable to any text field in the Hosted billing editor, and it will automatically populate on the specified card:
Multi-language & Multi-currency
Mantle’s billing supports both multi-language and multi-currency functionality, saving you the time and energy of translating your billing pages and handling currency conversions.
The currency in which customers are billed is set in their shop settings. When integrated with Mantle billing, this currency is pulled in and displayed with current fx rates, ensuring your customers see the most up-to-date pricing conversions. However, charges are always settled in USD.
Similarly, for multi-language support, the user’s preferred language specified in their Shopify account settings is pulled in and used to translate your billing pages to their chosen language.
How a customer sets their shop language and currency
Changing shop language:
- Open Shopify admin
- Click your store name (top right)
- Select Manage account
- Choose Region and language
Changing billing currency:
- Open Shopify admin
- Go to Settings
- Select Billing
- Click Billing profile
- Update Address and currency
Add to your app
To take advantage of Hosted billing, you first need to be set up with Mantle billing. Once that’s done, simply add this code to your app:
const { createHostedSession } = useMantle();
...
const session = await createHostedSession({ type: 'plans' });
open(session.url, "_self");And that’s it! Everything you’ve set up in your Hosted Billing editor will now display on the page you’ve configured in your app.